Showing posts with label Altenew Paint-A-Flower. Show all posts

Tuesday, April 15, 2025

Beautiful Blossoms Challenge #28

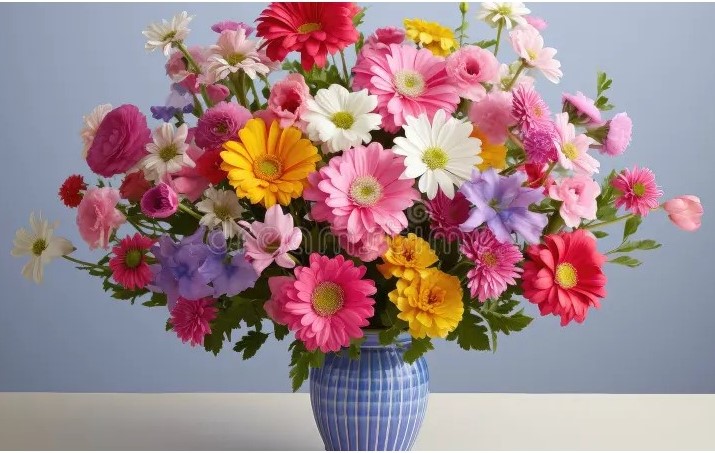
Hello Crafty Friends!  Today begins a new challenge month at The Beautiful Blossoms Challenge Blog, where the theme is Anything Florals Goes.  Our Optional Mood Board this month contains lots of bright and cheery Spring Colors, which I've tried in incorporate into my card design:


I would love to have this arrangement sitting on my dining room table! My card features the Altenew Paint-A-Flower Chamomile Stamp Set.  I've created a Get Well card, because we just can't have enough of those in our stashes, and I've colored the image using alcohol markers.


I've went with a square card profile this time, and added lots of mat layers to compliment the colors in the florals.  I've added gold sequins with a dot of white Nuvo Drops in the centers. The sentiment, which is part of the stamp set, has been popped on foam pads for dimension.


We hope you'll stop by the challenge and link up your floral focused projects.  There is a nice prize on offer, and we love seeing everyone's clever creativity.  Until next time, Happy Crafting!

Donna

**Challenges Entered:
AYLI - I gravitate towards Floral because I have so many floral stamps and images


Monday, May 6, 2024

Inspiration Station Challenge #61 - May 2024

Hi Crafty Friends and Happy Monday!  It's the 1st Monday of the month and that means a new challenge at The Inspiration Station Challenge Blog.  We have a pretty inspiration photo this month:


I love florals and the colors of the prompt are gorgeous, so for my team project, I've used the Paint-A-Flower Fashion Monger Dahlia Stamp Set from Altenew. 


My color inspiration came directly from the photo prompt.  I love Pinks, Purples and Yellows together, and the image has been colored using Spectrum Noir Alcohol Brush Markers.


I went with a Clean and Simple theme; adding a black mat border, gold and white paint splatters and dew drop embellishments.  The sentiment is from the same stamp set.

The team and I would love to see you at the challenge, we're always amazed at the different interpretations of the inspiration photo.  We hope you'll join in and share your creativity with us.

Until next time, Happy Crafting!

Donna

**Challenges Entered:


Wednesday, March 23, 2022

Ornamental Flowers

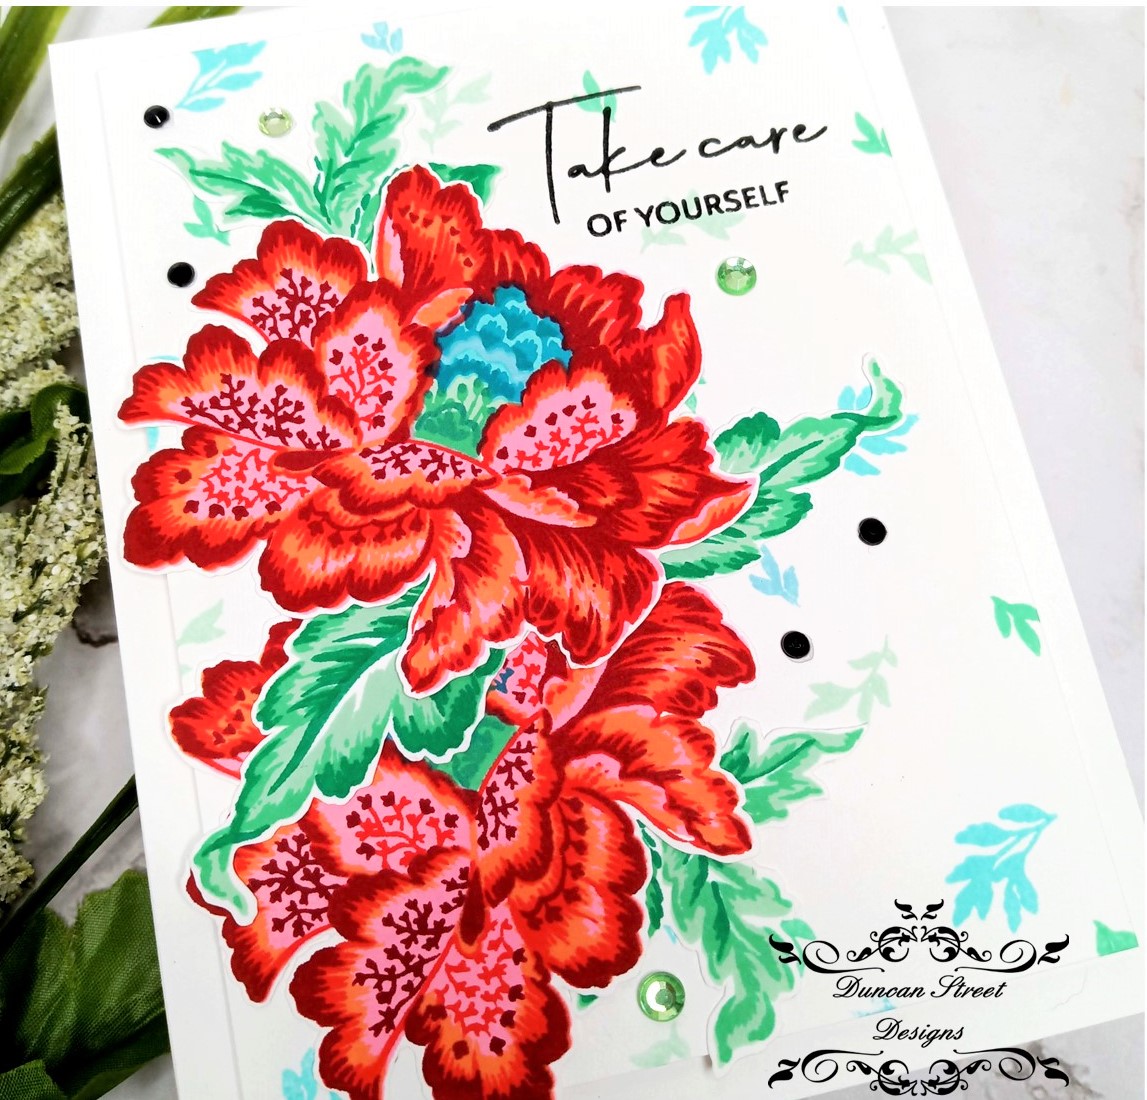
Hello Everyone and Happy Wednesday!  I've managed to get some time in the craft room this morning and I've created a card using this gorgeous layering stamp set from Altenew titled Ornamental Flower.  

The florals in this set have 10 layers, the leaves have 3 layers, so using Catherine Pooler Inks and color inspiration from the stamp packaging, I stamped 2 large blooms and 6 sets of leaves however I've only used 4 leaves in this design.


I understand 10 different stamp layers sounds intimidating but it's not and all the layers created the most gorgeous flower with so much detail!  The trick, in my honest opinion, is to settle in and take it slow.  No rushing here...jsut have fun with it and be amazed at how it turns out.


I started with Pink ink and worked my way through Coral, Reddish Orange, Crimson, Mint, Aqua, Teal, Caribbean Blue.  I wouldn't have originally thought to use these colors together but they are bright, cheerful and give me a Tropical Island Vibe.


I've created a stamped panel using smaller leaves and 3 of the same colors used in the flowers.  I trimmed this panel down to 3.75" x 5", popped on craft foam and adhered to the cardbase with liquid adhesive.  

The sentiment is from the Altenew Paint-A-Flower White Swan Echinacea Stamp Set and has been heat embossed.  The flowers and leaves have been fussy cut, arranged and adhered flat to the stamped panel using liquid adhesive.

Thanks so stopping by today, until next time - Happy Crafting!

Donna


**Challenges Entered:
The Card Concept - Inspired by the Flowers and colors


Wednesday, September 8, 2021

White Swan Echinacea

Hello Crafty Friends!  Today's card is a Sweet and Simple card with an Autumn theme using the new Paint-A-Flower for September from Altenew.  It's the White Swan Echinacea Outline Stamp Set.


For the Autumn theme, I thought yellow and orange would be a good color choice.  I started by heat embossing the image with fine detail gold power onto Canson Watercolor paper.  This gives the card some shine without adding other sparkly bells and whistles.

I then used my Gansai Tambi watercolors to paint the floral image and add a yellow background.  To used a piece of kitchen paper towel to blot some of the background, which have it some texture.


I matted the focal panel with brown card, splattered with Gansai Tambi Metallic Gold watercolor paint and adhered all to a cardbase of Neenah Solar White 110 lb. cardstock.

It's a sweet and simple design and a quick make.  Until next time, Happy Crafting!

Donna

**Challenges Entered:


Thursday, August 5, 2021

Altenew Academy Level 1 Course: Easy Die Cutting Techniques

Hello Friends!  Today I'm sharing my project for the Altenew Educator Certification Program Level 1 Course:  Easy Die Cutting Techniques.  This is a great course, loaded with ideas and tips for easy but effective die-cutting.  My card features layered die cuts and ink blending.

I've used the Altenew Craft-A-Flower Morning Glory Die Set to create 4 Morning Glories and leaves in shades of Purples and Greens.  This is a lovely set and appears intimidating, but actually it was enjoyable and therapuetic putting the pieces together.


To start, I ink blended 80 lb. white card in the shades I wanted for the flowers and leaves.  I'll admit I have colored card to use but I was in the crafting zone, home alone, candle lit and ink blending just sounded relaxing.

After allowing the inked card to dry completely, I proceeded to die cut the pieces and here's a Tip:  I used small tin trays to keep all the die cuts separated; organizing by color.  Once all pieces were cut, I started adhering the pieces together with liquid adhesive.  The die set has a guide to assist you in putting the elements together so it was not intimidating at all.  Once the die pieces are together, they become dimensional, chipboard-like embellishments, which I like a lot!


Naturally, no card of mine would be complete without sparkle and/or shine so I brought out some gold foil Washi tape I've had in my stash for several holidays but why wait for the Christmas Season?  I applied the Washi to a 2" panel in a diagonal pattern and adhered to the 110 lb. card base.  

I did a dry run layout for the floral and leaves and once I was pleased with the look, using Press and Seal Plastic Wrap, I picked up the die cuts and applied liquid adhesive to the backs.  The Press and Seal keeps everything together and makes adhering the layout to the card quick and easy.

I stamped the sentiment, which is from the Altenew Amaryllis Layering Stamp and Coordinating Die Bundle, die cut with a circle die and mounted on craft foam before adhering to the card front.  Lastly, I applied enamel glitter dots for additional interest.

I enjoyed the process of creating this card and the course was very informative and inspiring.  This is the first layering die set I've put together and probably wouldn't have tried using these types of sets had it not been for the course.  I'm glad I took that step...now I do believe I'm hooked!

Thanks for visiting today and until next time, Happy Crafting!

Donna

**Challenges Entered:


Friday, July 16, 2021

Altenew Academy AECP - Easy Ink Blending Techniques

Hello Friends and Happy Friday!  I'm back today with 2 projects for the Altenew Academy AECP Course: Easy Ink Blending Techniques.  This course teaches techniques for seamless ink blending with some added twists.  

I used to think ink blending was difficult and when I first tried a few years ago, I was rubbish at it.  I will be honest, the technique take a bit of practice and the right tools for a smooth blend.  Even though ink blending is not new to me, I gained knowledge from this course with techniques I never thought of trying. 

For my first project, I used the "traditional" ink blending technique taught in class.  I masked the center of the card panel and ink blended 4 shaded of blue inks, starting with the darkest on the edges and using lighter shades as I blended inward.  


I allowed the panel to dry completely before removing the mask.  I stamped the Tree and Sentiment, which are from the Altenew Festive Silhouettes Stamp Set, using Black Pigment Ink.  I replaced the mask and splattered the piece with Gloss White Acrylic Spray.  


For this technique, I used blending brushes, which I find give me a smoother blend than the foam pads.  To finish up this card, I matted the focal panel with black card, mounted on craft foam and adhered to a 110 lb. card base.

My next project features ink blending and a bit of water coloring with inks.  This was another technique taught in class that I've never thought of and I'm surprised because it's so obvious and easy to do.


To start, I ink blended on the right bottom half of the card panel using blending brushes and 4 colors of complimentary inks.  I used Canson Mixed Media Paper as I knew I would be using water on the piece.  After the ink dried, I stamped the Altenew Paint-A-Flower Clematis Josephine image over the ink blending.  


Next step was to use darker shades of the inks I used to blend, add water to the areas I wanted to appear darker and add the darker inks to the wet areas.  This technique leaves the ink blending fairly intact and allows for the "watercolor" look with added shading.  Once everything was dry, I splattered the piece with watered down Violet ink and Gloss White Acrylic Spray.

I did not have a snippet of card in the fuchsia/violet color so I ink blended the top and left side of the snippet, adhered the focal panel, matted with black card, mounted on craft foam and adhered to a 110 lb. card base.

To finish, I heat embossed the sentiment, from the same stamp set, on a snippet of black card, mounted on craft foam and adhered to the card base.  Lastly, added sequins for a bit of shine and interest.

I thoroughly enjoyed this course and was very pleased with the finished cards.  Most of all, I liked the idea of taking ordinary ink blending to new heights.  Thanks for visiting and reading through my post today.  I'll be back soon with another AECP project so until next time, Happy Crafting!

Donna

Products Used:
Catherine Pooler Inks
Neenah Classic Crest Solar White Card Stock (110 and 80 lb)
Blending Brushes from Amazon
Ranger Fine Detail White Embossing Powder
Recollections Black Cardstock 80 lb
Sequins - Unbranded

**Challenges Entered:
Holiday Card:


Clematis Josephine Card:


Thursday, June 17, 2021

Lotus with Lots of Love

Hello Friends and Happy Thursday!  Todays card features Lotus Blooms, Lily Pads, Watercoloring, Die Cutting and a Gelli Plate Background.


I stamped, heat embossed and watercolored the Altenew Lotus from the Paint-A-Flower Stamp Set for June 2021.  I die cut the focal image and mat using the Essentials Diagonal Stitched Circles from Pink Fresh Studios and placed on a background I created last year using my Gelli Plate.  The sentiment is from the Lotus set and has been heat embossed with fine detail white powder from Ranger.  Lastly, cream twine and sequins were added for additional interest.

Thanks for stopping by!  Until next time, Happy Crafting.

Donna

**Challenges Entered:
Aud Sentiments
Outlawz Twisted Thursday
Cute Card Thursday
Sisterhood of Crafters
Happy Little Stampers Watercolor
Creative Moments
Creative Craft Cottage


Wednesday, May 19, 2021

Chamomile Flowers #2

Hello and Happy Wednesday!  Todays make and share features another set of Chamomile Flowers from the Altenew Monthly Paint-A-Flower Set.


Yesterday I shared a card using one of the Chamomile bunches from the stamp set and this card features the other image.  I wanted to try the Black Magic coloring technique, in this case I used Kraft card and Prismacolor Pencils.  For this technique, you stamp the image (if using black card, you will also heat emboss with white powder), lay down a base of white and color over top.  The white layer allows the colors to Pop off the dark background.  

I've kept the design simple, using the same Scrapbooking Queen sentiment and adding Nuvo Crystal Dots.  If you haven't tried the Black Magic Technique, give it a go.

Until next time, Happy Crafting!

Donna

**Please stop by our challenge at the Inspiration Station!  It's an inspirational challenge and your interpretation of the photo is your own!  Visit and Enter :)

**Challenges Entered:


Tuesday, May 18, 2021

Seeds of Friendship

Hello and Happy Tuesday!  Today I'm sharing a card created using the Paint-A-Flower Monthly Stamp Set from Altenew.  This is the May 2021 set and it features a bouquet of lovely Chamomile Flowers.  This set includes 2 floral images and 5 sentiments/word stamps; the sentiment used today is from a Scrapbooking Queen set that I've had for ages.  I don't believe the Scrapbooking Queen sells supplies any longer.


I've colored the image with Spectrum Noir Alcohol Markers, then fussy cut and mounted on foam pads for dimension.  I've ink blended the area directly behind the focal image with the newest Distress Oxide color - Salvaged Patina, splattered diluted Dina Wakley Black Gloss Spray and stamped the sentiment using Versafine Onyx Black Ink.  I adore this set and can't wait to create using the other floral image in the set.

Until next time, Happy Crafting!

Donna

**Please stop by our challenge at the Inspiration Station!  It's an inspirational challenge and your interpretation of the photo is your own!  Visit and Enter :)

**Challenges Entered:


Friday, April 30, 2021

Freestyle Watercolor Florals

Hello and Happy Friday!  The weekend has finally arrived and today flew by but I did manage some crafty time this afternoon.  I dusted off the Gansai Tambi Watercolors to loosely paint this gorgeous floral from Altenew.  It's the newest Paint-a-Flower Outline Stamp Set for April Subscribers named Coral Sunset.


I was inspired by the gorgeous projects using this stamp set that I found while scrolling through Pinterest.  I stamped and heat embossed the image on Strathmore 500 Series Ready Cut watercolor paper, then  "freestyle" painted the image with soft lavender and blue tones.  Once dry, I stamped the sentiment in the lower right corner and splattered with black watercolor paint.  The panel is adhered to the card base, no layering used in this design.  

If you've not tried "Freestyle" watercoloring. give it a go...it's so freeing to not worry about how well you watercolor because it will always look pretty!

Until next time, Happy Crafting!
Donna

**Challenges Entered:


Saturday, April 24, 2021

Coral Sunset

Hello and Happy Saturday!  I hope your weekend is fun, relaxing and crafty!  Today's make and share features a gorgeous floral stamp, lovely sentiment, heat embossing and coloring.


My A2 sized card started with stamping the florals from the Altenew Paint-A-Flower April monthly subscription set and heat embossing with gold embossing powder.  I stamped the same image on the top and the bottom; just rotating the card in the Misti.  I colored the images with Prismacolor Pencils, stamped the sentiment. which is from the Altenew "Beautiful Quotes" stamp set and added a snippet of designer paper along the left side.  For the final bells and whistles, clear sequins were added.

Coloring the image took a bit of time but I had my cuppa tea so I settled in and enjoyed the process.  I love the look of the completed design.  Until next time, Happy Crafting!

Donna

**Challenges Entered: