Monday, January 31, 2022

Pammie's Inky Pinkies - Sunshine

Hello and Happy Monday!  It's the 5th Monday of the Month and that signals a "themed" challenge at Pammie's Inky Pinkies.  The theme this week is Sunshine...which is what many have been asking for since the weather has been cold and dreary.  It's been cold in Florida...colder than we are used to but it could be worse.....at least we're not dealing with snow and ice!

The sponsor this round is Newton's Nook and I've used the Newton's Day Dream Stamp set to create my Design Team card for this challenge round.


I've inked through a Sun Ray stencil on a panel of patterned paper to create the sunny background.  Newton has been colored with Spectrum Noir Alcohol Markers and fussy cut along with the speech bubble.  


To break up the bright yellow and "ground" the image, I've adhered flag banners and doodled them with "stitching lines".  I've popped up the speech bubble and Daydreaming Newton on craft foam for that dimension I like and lastly, added blue sequins for additional interest and shine.

Please join us this week at Pammie's Inky Pinkies and share your crafty Sunshine themed projects.  Until next time, Happy Crafting!

Donna

**Challenges Entered:
Your Next Stamp - Sharing Summer


Sunday, January 30, 2022

Not 2 Shabby Designs - Latte Love

Hello Everyone and Happy Sunday!  I hope you're staying warm and enjoying your favorite hot beverage.  Speaking of hot beverages, today I'm featured on the Not 2 Shabby Instagram Page with this fun Easel Card that's all about the Coffee...more specifcially a White Chocolate Mocha Latte (which is my favorite)!


For my card, I've colored up the Holiday Latte Digital Stamped image from Not 2 Shabby using Spectrum Noir Alcohol Markers.  The card base is A2 sized and folded to create an Easel Card, the papers are snippets from Recollections and American Crafts.  I'm planning on sending this card as a Valentine's Day greeting however the image is versatile. 


I've used a large Tag die from Gina K. Designs to cut panels for the front and inside.  The Latte Cup has been fussy cut and to add more interest, I've inked the tag using a Coffee Stain Stencil and added a Baker's Twine Bow.  

Stop by @not_2_shabby_shop on Instagram to see more Design Team projects using digital stamps and more from Not 2 Shabby.

Until next time, Happy Crafting!

Donna

**Challenges Entered:


Friday, January 28, 2022

Altenew Academy Level 2 Course: Masking Unleashed

Hello Crafty Friends!  Today I'm sharing a card created for the Altenew Academy Level 2 Course:  Masking Unleashed.  This course focuses on Masking tips, tricks and techniques for creating interest in your cardmaking. 

For my card, I've used the Altenew "Indoor Garden" Stamp Set to create a Friendship Card.  I like to have a nice variety of card themes in my stash and friendship cards are ones I send often.


  1. To start my design, I've created a background panel that looks like it's been stenciled but the leaf design has been created using masks.  I die cut several leaf masks using a die from the Altenew "Poppy Arrangement" Die Set.  I also die cut an Oval from the masking paper as well.
  2. I arranged the leaf masks in a random pattern and layered the oval mask over the leaves making certain all the masks were adhered very well.
  3. I ink blended over the masked panel using a light pink and used a darker shade along the edges.  
  4. I set the panel aside to dry; I wanted the ink to dry completely before removing the masks.
  5. Once the panel was dry, the masks were removed to revealed the "faux" stenciled background.  I stamped the succulent images and basket directly to the panel using varying shades of blue and green inks.  
  6. The sentiment, from the Altenew Paint-A-Flower Himalayan Poppy Stamp Set, was stamped directly to the panel.  
  7. Before adhering the inked panel to the black mat, I wrapped Altenew's Enchanted Gold Metallic Thread  around the card to give the potted plant a "landing" spot so the image wouldn't appear to be  floating in air.  
  8. Lastly, all were adhered to a 110 lb. cardbase and black gems were added for additional interest.


This was an enjoyable class and the best bit was using die cut masks to create a faux stenciled look.  Why didn't I think of this technique?  Thanks to the course, I'll use masks more often.  

This completes my class project and also completes all of the coursework in Level 2.  I now await my Level 2 Final Assigment.  I'll be back soon with the projects for that!

Until next time, Happy Crafting!

Donna

**Challenges Entered:
As You Like It - I like to add color by ink blending but my fav way is with alcohol markers


Wednesday, January 26, 2022

Altenew Academy Level 2 Course: Magical Markers Techniques

Hello Friends!  Today I'm sharing a card created for the Altenew Academy Level 2 Course:  Magical Markers Techniques.  This course focuses on tips, tricks and techniques for using your Alcohol Markers in creative ways.  

For my card, I've used the Altenew "Cotton Comfort" Stamp and Coordinating Die Bundle to create a Sympathy Card.  I don't have a need for this type of card at the moment thank goodness, however I thought the Cotton Blooms lent themselves to a Sympathy card.  


  1. To start my design, I wanted to create a card that had a soft color palette so using medium shades of pink and blue alcohol markers, I laid down color on vellum.  There was no rhyme or reason to how I added the color; I just scribbled the color on using the markers' broad tip.
  2. Using an eye dropper, I applied 91% Isopropyl Alcohol to the vellum and moved the alcohol ink/isopropyl alcohol mixture around with a Rocket Air Blaster.  The colored areas dried almost immediately due to the alcohol evaporating so quickly.  
  3. Using a stamp positioner, I stamped the images directly onto the colored side of the vellum.  TIP:  Because I've stamped on Vellum and did not use a Solvent Ink such as Staz-On, I must heat emboss because the pigment ink will not dry on this non-porous surface.  
  4. Using the coordinating dies, I cut the images and set aside to prepare the card panel and sentiment.
  5. The background was a little too plain for my liking so I embossed the panel with a leaf patterned folder.  
  6. The sentiment; from the same stamp set, was stamped and heat embossed using fine detail white embossing powder.  TIP:  When embossing, remember to use your anti-static powder.  When I heat emboss on black card, I add more anti-static powder than I think I need.  This always ensures I get a crisp emboss.
  7. I arranged the cotton picks and once I was pleased with the layout, I picked it up with Press and Seal Plastic Wrap.  This is my "go-to" method for picking up arrangements and guarantees I won't have to fuss with it again once I have it the way I want it.
  8. To adhere the vellum to the panel, I carefully applied liquid adhesive to the thick parts of the image outline.  I purposely left some areas of the image without adhesive so there would be a bit of dimension.  The sentiment strip was popped on craft foam.  


This completes my class project and I'm pleased with the result.  This was a fun class and I enjoyed the planning process.  This particular technique was not shared in the course however the course provided the ideas and I provided the design. 

Until next time, Happy Crafting!

Donna

**Challenges Entered:

Saturday, January 22, 2022

Altenew Academy Level 2 Course: Impressive Heat Embossing

Hello Crafty Friends!  Today I'm sharing a card created for the Altenew Academy Level 2 Course:  Impressive Heat Embossing.   I love to heat emboss so this class was right up my alley.  This course covered tips, tricks and techniques for adding heat embossing in ways that differ from the standard stamp and heat embossing method.  

For my card, I've used the Altenew "Here For You" Stamp and Coordinating Die Bundle to create a Sweet and Simple Card....my term for a Clean and Simple Card that had a bit more pizazz.


  1. To start my design, I stamped and heat embossed the large coneflower using watermark ink and fine detail Gold Embossing Powder.  The flower was cut using the coordinating die.
  2. Using Staedtler Watercolor Pencils, I've watercolored the floral and leaves then set aside to dry.
  3. To prepare the background, I created a frame using an Embossing Pen and Fine Detail Gold Embossing Powder.  TIP:  I scored the panel at 1/4" on each side before going over the line with the embossing pen. This created a "trough" and gave the embossing dimension.  
  4. The sentiment, from the same set, was stamped with watermark ink and heat embossed with the same gold powder.
  5. To create additional interest in the background, I splattered the card with water, sprinkled with powder and heat embossed again.  The powder will stick to the water droplets and this technique was one shared in class.  I never thought to use water instead of watermark ink to emboss with.
  6. Lastly,  I've adhered the panel to a 110 lb. card base, popped the floral on craft foam for dimension and placed it on the embossed panel.

This completes my class project and I'm impressed with the result.  The Altenew Academy classes have taught me so much and it's been a fun time learning so many cool tips and techniques.  I have 2 more classes to go before compeleting Level 2.  I'll be back with another AECP project soon.

Until next time, Happy Crafting!

Donna

**Challenges Entered:
AYLI - Favorite coloring medium is alcohol markers but my next fav is watercolor as in this project


Monday, January 17, 2022

I Heart U

Hello Crafty Friends!  Today begins a new challenge round at Pammie's Inky Pinkies and our sponsor this week is Sheepski Designs.  For my design team project, I've colored up a lovely Unicorn for a Valentine's Day card.


I've colored the Unicorn Image No. 186 from Sheepski Designs using Spectrum Noir Alcohol Markers for my landscape A2 sized card.  The papers are from the American Crafts "St. Valentine" 6x6 paper pad, the heart dies are the Stitched Fancy Scalloped Heart Dies from Kat Scappiness.


I've layered everything on a 110 lb card base, popped the smaller hearts on craft foam for dimension and added Passion Pink Pearl Embellishments from Kat Scrappiness as a final detail.  

The Day of Love is approaching fast....have you started your Valentine's Day cards yet?  Until next time, Happy Crafting!

Donna

**Challenges Entered:
Dies R Us
NBUS - New to Me image


Jan's Digi Challenges Mid-Month Inspiration

Hello and a Happy, Wintery Monday!  It's cold here in Florida...I know...it's Florida but it's cold for us.  Winter has set in across the Northern Hemisphere!  My card for Jan's Mid-Month Inspiration Post will take your mind off Winter and on to Valentine's Day.

For my card today, I've created a Mini Slimline Card using the Reverse Scalloped Mini Slimline Dies with Hello Sentiment from Kat Scrappiness and the Sweetheart Candy Digi Image from Jan's Digi Stamps


After die cutting the focal image, I inlaid it back into the reverse scallop frame, secured the cuts fron the back with clear tape and adhered to a hot pink mat.  


For a finishing touch to the design, I've added Baby Pink Pearl Embellishments from Kat Scrappiness.  The team and I would like to invite you to stop by the inspiration post and also enter the January Anything Goes Challenge.

Until next time, Happy Crafting!

Donna

**Challenges Entered:


Inspiration Station Challenge #22 - Warm Up with a Cup

 Hello and Happy Monday!  Today is a busy posting day so I best get started with the newest challenge at The Inspiration Station.  The inspiration for this challenge round is a warm cup of....whatever you like!  I love this photo!


For my design team project, I wanted to create something a bit different than a card so I went 3-D.  Using a new SVG cut file from Lori Whitlock for a Hot Cocoa Mug I recently purchased, I fired up my Cricut Cutting Machine and created a Mug of Cocoa and Saucer, complete with a dollop of Whipping Cream.


The plaid papers are from a Memory Box "Christmas Plaids" 6x6 paper pad and the whipped topping is adorned with red pearls from Kat Scrappiness.


I've used Crystal Stickles on the Cream and Gold Stickles around the saucer edge.  In hindsight, I should have darkened the "cocoa" with more Vintage Photo Distress Ink...and I may go back and do that being careful not to contaminate that glorious cream dollop.

We invite you to join us at The Inspiration Station.  We hope to inspire you with our projects and love to see how the photo inspires your creativity.  Let's get creative together!

Until next time, Happy Crafting!

Donna

**Challenges Entered:
Use Your Stuff:  Inspired by the Teacup Ride at Disneyland

Saturday, January 15, 2022

Altenew Academy Level 2 Course: Color Your Day

Hello Everyone, I'm back to share another Altenew Academy course project.  Today's card was created for the Level 2 Course:  Color Your Day.  This 6 part course covered techniques and ideas on adding splashes of color to projects for visual interest and fun.

For my project, I've used the Altenew Fantasy Floral Stamp and Coordinating Die Bundle along with stenciling to create an interesting design.  My design was directly inspired by one of the projects the instructor, Therese Calvrid completed in the course.  


To begin my project, I considered a design for the background and the colors I wanted to use.  I decided upon a simple yet effective neutral focal with a bright background.  The floral set are layering stamps so using all 4 inks in the Altenew Gentlemen's Gray Crisp Dye Ink Mini Cube Set,  I stamped from light to dark, building up the colored layers.  I die cut the florals and leaves with the coordinating dies and set aside to prepare the background.

Using a light shade of yellow ink, I blending over the entire stencil then came back with a darker shade of yellow and blended in a few areas.  If you'll notice, I varied my pressure when blending the light yellow so I would get the look of using more than 2 inks; parts of the lighter color is even lighter within the area and that was due to the pressure I applied when blending.  Once I was happy with the stenciling, I splattered the panel with Gold Watercolor Paint and set aside to dry.


Once the panel was completely dry, I stamped the sentiment from the Altenew More Than Words Stamp Set.  In hindsight, I should have stamped the sentiment prior to splattering with the gold watercolor but as it happened, there were no splatters where the sentiment was stamped.  That was pure luck and next time, I will stamp the sentiment prior to splattering.

To complete the card, I adhered the stenciled panel to a black mat, arranged the florals and adhered to the panel flat using liquid adhesive; only popping the front floral on craft foam.  Gray Opal Pearl Embellishments from Kat Scrappiness were added for additional interest.

This was a fun course and I thoroughly enjoyed it.  It's fun to experiment with color in your designs; I wouldn't have thought to use florals in a neutral color but in doing so, the bright background made those florals Pop off the page, even if they are gray.

Thanks for stopping by, I appreciate your visit.  Until next time, Happy Crafting!

Donna

**Challenges Entered:

Not 2 Shabby Sweet Valentine

Hello Crafty Friends!  I hope you're having a wonderful Saturday and staying warm!  Today, I'm on the Not 2 Shabby Instagram Page with a card I've created using the new Sweet Valentine digital image, which is part of the January New Digital Release!

Before we get to my card, I want to remind everyone of the Sticker Sale at the Not 2 Shabby Shop.  Today (14 January) is the last day to save 15% off all stickers...and there are some adorable ones! 


On to the crafty card goodness.  Doesn't this sweet scene look yummy?  There's a strawberry cupcake, a Biscotti with Pistachios and a strawberry icing and a Hot Vanilla Bean Latte.....gosh I'm hungry!


I've colored the images using Spectrum Noir Alcohol Markers and the papers are from the Bo Bunny "Sweet Moments" 6x6 paper pad.  I've die cut the focal image using a stitched rectangle die from Kat Scrappiness.


To complete the design, I've added pink sequins, highlights using a white Gelly Roll pen and Wink of Stella to the heart on the cup and the cupcake frosting.

Thanks for stopping by and until next time, Happy Crafting!

Donna

**Challenges Entered:


Hugs and Smooches

Hello and Happy Saturday!  I'm on the Kat Scrappiness Blog today sharing a Valentine's Day Card created with new products from the Kat Scrappiness January Valentine's Day Release


This card was so fun to create and it looks complicated but the dies made it easy.  To start my card, I cut strips of card from the Spectrum of Love Slimline Paper Pack and adhered to the back of the Smooches Coverplate Die cut in rainbow order (ROYGBIV).  This created a card front full of fun and colorful lips.  This die set also includes the extra large pair of lips that I cut from bright pink card, adhered to a black shadow and applied Glossy Accents for that shiny Lip Gloss Look.


To complete the design, I've cut the sentiment using the Rainbow Hugs Sentiment with Shadow Die from Lavendar card and popped on craft foam for dimension.  Lastly, I've applied Wink of Stella to the sentiment for the extra sparkle a Valentine's Day card requires.

Thanks for stopping in today!  Until next time Stay Safe, Be Healthy and Happy Crafting!

Donna W.

**Challenges Entered:


Friday, January 14, 2022

Altenew Academy: Beautiful Details

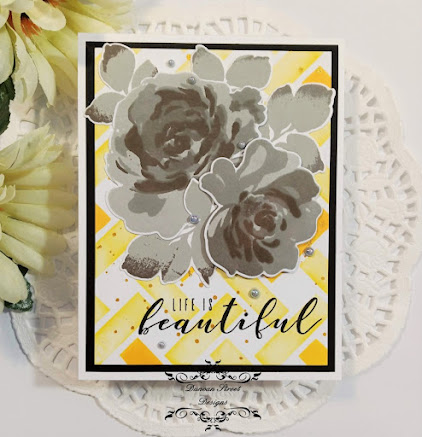
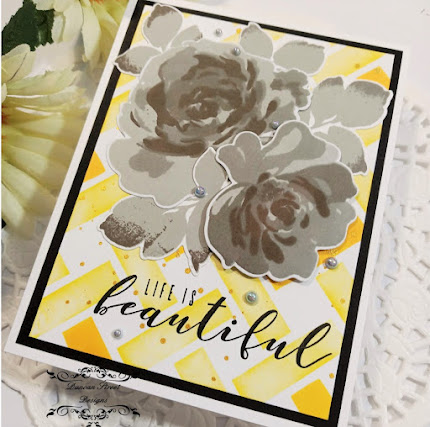
Hello everyone and Happy Friday!  Today I'm sharing a card I've created for the Altenew Academy Level 2 Course:  Beautiful Details.  This course was one of my favorites thus far but also the most challenging for me.  It's not a difficult course however it pushed me to experiment with technqiues and "let go" of my need to stay within my comfort zone.

My card today features florals from the Altenew "Majestic Bouqet" Stamp and Coordinating Dies Bundle.  This is a huge, gorgeous set that I find myself coming back to often.


For my card, I wanted to create a sketchy design, so using a technique taught in the course, I "inked" 1 layer of the floral and leaf images with a Sakura Pigma Brush Marker and stamped.  By inking the stamp with the marker, I got the sketchy, textured look I was going for.  

TIP:  The Sakura Brush Markers are filled with archival ink and the ink dries quickly.  In order to get the image stamped before the ink dried, I used the "huffing" technique.  If you're not familair with this technique, you breathe warm, moist air on the stamp making that familiar huffing sound when blowing the air from your mouth...thus huffing on the stamp.  This proccess keeps the ink moist for a bit..long enough to stamp.

I stamped the image outline over the color in order to distinguish a flower and leaves.  Now, this is where I had to "let go" of my need to continue adding color. I had a difficult time just leaving it alone to let those streaky, sketchy lines just be......and this is so not my style.  I die cut the images and set them aside to prepare the background.


I wanted the background to match the sketchiness of the images but didn't know what to do.  I thought about stenciling, hot foiling and watercoloring a background but those didn't appeal to my idea.  Then it came to me, if I drag an ink pad down the card with just 1 pass, it would provide a sketchy look so that's what I did.  

Using "Silver Lake" Crisp Dye Ink from the Gentlemen's Gray Mini Ink Cube Set by Altenew,  I made a few passes down the card to get some background interest.  To complete the background, I splattered with pink ink and doodled lines with dots using a Uni-ball Deluxe Micro Pen. 

To complete the card, I arranged the florals and adhered to the card panel, popping up the front floral on craft foam.  My sentiment was made using a Dymo Label Maker and the last beautiful detail I've added were Gray Pearl embellishments from Kat Scrappiness.

I didn't think this design was going to make it's way to completion.  I had my doubts but after it was completed, I can honestly say I'm happy with it.  I like the background and how it looks like old, weathered wood.  I love the sketchy, artsy look of the florals and leaves.  The Altenew courses have been so much fun and I have finished each course with a fresh outlook on techniques.  The courses I've enjoyed the most have been those that have pushed me out of my comfort zone.  It's a lesson in letting go and letting your creativity take over.

Until next time, Happy Crafting!

Donna
 
**Challenges Entered:


Monday, January 10, 2022

Not 2 Shabby New Digital Release and IG Hop

Hello Crafty Friends and Happy Monday!  I'm happy to announce I'm part of the Not 2 Shabby Digital Creative Team and today we're featuring a new digital release!  There's also an Instagram Hop so you'll definitely want to Hop along and comment for the opportunity to win a $25 Gift Voucher to the Not 2 Shabby Shop.  You can find the Hop HERE.


My card today features the new Stack of Pancakes Digital image and Coordinating Sentiments.  A fun  image that's also versatile, perfect for those Valentine's cards.


I've colored the image using Spectrum Noir Alcohol Markers and the papers are from the American Crafts "St. Valentine" 6x6 paper pad.  I chose to make my "syrup" a chocolate sauce....yummmm.  The sequins are from my stash and the card base is 110 lb. Neenah Solar White Classic Crest card.


I've fussy cut the focal image, tag and sentiments the popped on craft foam for that dimension I love on cards.  The strawberry, bluberries and the pat of butter are great!  Everything is included in this set and it looks so yummy.  

Please stop by the Not 2 Shabby Shop for a wide variety of stamps, craft supplies and digital images.  And don't forget the Instagram Hop!  There's a $25 Gift Voucher up for grabs:  @not_2_shabby_shop

Until next time, Happy Crafting!

Donna

**Challenges Entered:
Use Your Stuff - Bunny eating the pancakes in Wreck It Ralph


Friday, January 7, 2022

Colour Crazy Challenge - Sheepski Designs

Hello and Happy Fri-YAY!  A new challenge round has started at The Colour Crazy Challenge Blog with a theme of Anything Goes and the sponsor is Sheepski Designs.  

For my design team project, I've created a Birthday Tag using the Gerbera Daisy digi stamp from Sheepski.  Gerbera Daisies are usually brightly colored, however for my project, I've chosen a Coral color palette.


I've cut a large tag using a tag die from Gina K. Designs and the patterned papers were gifted to me in a card swap. The focal panel was cut using an oval die and popped on craft foam, then adhered using liquid adhesive.  The sentiment is from an older Kaisercraft sentiment set; an oldie but definitely a goodie.


Lastly, Spring Green Pearl Embellishments from Kat Scrappiness have been added along with metallic thread from Altenew.

Stop by the Colour Crazy Challenge Blog and enter your project for an opportunity to win a prizw from Sheepski Designs.  Until next time, Happy Crafting!

Donna

**Challenges Entered:
As You Like It:  Fav Gift Decoration is a Tag because they add an additional element of fun and thoughfulness to the gift


Wednesday, January 5, 2022

The Paper Funday January 2022 Challenge - Winter Landscapes

Hello Friends!  It's the 1st Wednesday of the month and a new challenge has started at The Paper Funday Challenge Blog.  The theme is Always Anything Goes with an Optional Twist.  The Twist this month is Winter Landcapes.

For my design team project, I went with the optional Twist and used the "Sittin' Tree" 4x6 Stamp Set from Maymay Made It to create a Winter Landscape card.


Using a black card panel, I stamped and heat embossed the images using Fine Detail White Embossing Powder by Ranger.  I used an embossing pen and the same detail powder to create the snow flurries, flakes and ground cover.


The focal panel was layered on silver mirror card and adhered flat to the 110 lb. card base.  The sentiment comes from the Lawn Fawn "Winter Fox" mini stamp set and was die cut, layered with mirror card and popped on craft foam.  

This stamp set is very versatile.  It has leaves and buds for the different seasons.  Leaving the tree bare and adding "snow" made it the perfect Winter Landscape.

Please join us at The Paper Funday this month for your chance to win one of two prizes on offer.  Until next time, Happy Crafting!

Donna

**Challenges Entered:
All Sorts:  Black, White and Silver
SSS Wed. Challenge - Something New = New Season...Winter
SSS Monday Challenge - Something New - New Season...Winter

Sending You Love

Hello Crafty Friends!  I'm on the Kat Scrappiness Blog today with a card created using some of the new products from Kat's January Valentine's Release.

Before I get to my card, I want to remind everyone of the Instagram Hop that is currently going on and the New Valentine's Day Release at Kat Scrappiness.


Visit the new release Blog post HERE and comment for the opportunity to win a $25 Gift Voucher to the Kat Scrappiness Shop.  

There are also many Valentine's themed products and embellishments on Sale.   Now is a great time to stock up for those Valentine's Day cards, Scrapbook Layouts, Journal pages and more.


Don't forget to Hop along with the Kat Scrappiness Team on Instagram for the opportunity to win a $25 Gift Voucher to the Kat Scrappiness Shop.  The Winner will be announced on 08 January.

Now for my card:


To start my card, I ink smooshed a panel of watercolor card using shades of pink inks.  Using the new A2 Heart Sunburst Cover Die, I ran the watercolor panel through the die cutting machine and kept the cut pieces in the panel. 


I've die cut the sentiment using the Sending My Love Sentiment Die with Shadow; however I adhered flat to the card panel without the shadow layer and added Glossy Accents for dimension and shine.

Next, using the smallest heart die in the Zig Zag Heart Dies, I cut a heart, popped on craft foam, adhered to the center of the card base and added Glossy accents to the inner portion.

Lastly, I've added embellishments from the Grape Pearl Mix  for that extra bit of interest, texture and shine.

That's all I have for you today.  I'll be back on the 15th of the month to showcase another card featuring some new products from the Valentine's Release.  Until next time, Happy Crafting!

Donna

**Challenges Entered: