Showing posts with label Stenciling. Show all posts

Wednesday, January 7, 2026

The Paper Funday Challenge - January 2026

Hello Friends and Happy Wednesday!  It's the first Wednesday of the month and it's time for a new challenge at The Paper Funday Challenge Blog.  The team had a nice holiday break and we're ready for some fun and creativity.  Our generous sponsors this month are Taylored Expressions and Sweet November Stamps, with our optional twist for January being a Sketch:

For my design team project, I chose not to use the optional sketch but instead used the Bitty Bouquet Stamp and Coordinating Stencil Set from Taylored Expressions.  This set was included in the Nature's Canvas Cardmaking Kit, and I don't believe it is sold separately.

To start, using inks from Catherine Pooler, I've stamped the panel with the green stems and leaves, then ink blended the remaining layered stencil elements.  The result is a very cheerful background panel, which I thought would be a perfect Friendship card (or even a Galentine's Day card).


I've die cut the sentiment using a mini expressions die set from Creative Expressions, and to prevent it from getting "lost" against the busy background, I've adhered it to a panel of vellum.  Lastly, I've added pink faux gems to accent the sentiment.

I hope you'll stop by The Paper Funday Challenge and see what my teammates have created using items from our sponsors, and we hope you'll join us this month and share your creative makes.  

Until next time, Happy Crafting!

Donna

**Challenges Entered:


Sunday, July 6, 2025

Paper Funday Challenges - July 2025

Hello Friends, I hope you're weekend was fantastic and if you celebrated the 4th of July holiday, I hope you had a fun time.  I'm very late with my design team project for The Paper Funday Challenge, which began on the 2nd of July; life has a way of getting in our way doesn't it?

Our challenges are Always Anything Goes with an Optional Twist.  The Twist this month is Fun with Stencils, and I've chosen to go with the twist for my card design.


Using the Abstract Floral Stencil from Erin Lee Creative and inks from Catherine Pooler, I've created a simple and fun card for Summer.  The stencil is sized 6x6 and one layer, I've blended on a 6x6 piece of card and trimmed down to an A2 size.


To finish off the design, I've added holographic embellishments from Stampin' Up and a die cut sentiment from Kat Scrappiness; the sentiment shadow is vellum.

We would love for you to stop by the challenge and share your designs with us!  Until next time, Happy Crafting!

Donna


Monday, August 7, 2023

Inspiration Station Challenge #52 August 2023

Hello Friends and Happy Monday!  Today starts a new challenge month at The Inspiration Station Challenge Blog.  If you're not familiar with the challenge, the premise is to be inspired by the photo prompt provided and let your creativity flow.  Our photo prompt for August 2023 is:


Needless to say, everything in this photo spoke to me: the butterflies, the colors and the "out of focus" parts of the photo.  I've used a portion of a layering Butterfly Die Set from Altenew and embossing powers to create my card for this challenge.


To start, I stamped a panel with the Old Letter Background Cling Stamp from Simon Says Stamp, using gray ink from Catherine Pooler.  Using a stencil from Uniko, I've applied embossing ink through the stencil and heat embossed translucent Distress Embossing Powders in colors Twisted Citron, Wilted Violet and Wild Honey. 


I've die cut only the base layer of the layering Butterfly in black card, cut a piece of stiff honeycomb ribbon for the butterfly to rest on and adhered all to the card panel using Fabri-Tac Adhesive (due to the ribbon).  Lastly, I've added a pre-made sentiment strip from Simon Says Stamp, which has been popped on craft foam.

I hope you'll join us at the challenge.  The team and I always enjoy seeing how the photo inspires everyone's creativity. Until next time, Happy Crafting!

Donna

**Challenges Entered:
Through the Purple Haze:  Punch, Girly, Floral


Saturday, July 29, 2023

Luscious Flora

Hi Friends and Happy Saturday!  The weekend has arrived and I hope you have something wonderful planned.  Me?  Maybe some swimming but definitely some rest, relaxation, good food and crafting.

Today I have a quick share featuring the Altenew Dynamic Duos Luscious Flora Stamp and Layering Stencil combo.


This set is lovely as a background or on it's own, I chose to create a background with distress ink colors that have an Autumn feel.  I stamped the background, layered the stencils and inked through.


I've heat embossed the sentiment, from the stamp set, with fine detail white embossing powder and popped on craft foam for dimension.  Lastly, I've added clear gems for a bit of POP and bling.

That's all for today.  I wish you a fabulous weekend and I shall be back soon.  Until next time, Happy Crafting!

Donna

**Challenges Entered:
Just Us Girls - CASE'd Elizabeth using her 1 layer floral background
AYLI - Prefer Florals because I have SO MANY floral sets.  But I love gingham too..esp. in the Spring
Outlawz Twisted Thursday - Rustic here, I've tried to get a Rustic vibe using a rich color palette

Saturday, October 1, 2022

The Four Seasons Challenge - Autumn Month 2

Hello Friends and Happy October 1st!  It's time for a new challenge month at The Four Seasons Challenge Blog and we're entering the 2nd month of Autumn themes.


It's the month of things that go bump in the night and my project features layered stenciling using the Spooky Icons layering stencil from Simon Says Stamp.


This is a 4 piece stencil set and is actually easy to layer up, plus I adore the fun images!  I chose traditional Halloween colors using Catherine Pooler inks.  Catherine Pooler Inks are my favorite at the moment and I've used vivid colors from the Party Collection line.


My card measures 5.5" square, which is my favorite square size to create as I can use most of a 8.5" x 11" sheet of card.  I've added a black mat, tied some black twine, and added some shine with sequins.  The sentiment is the Happy Halloween Die Sentiment with shadow from Kat Scrappiness, the shadow layer was cut from vellum.

Please visit us at The Four Seasons Challenge this Month.  We are always excited to see your makes and visit your posts.  Until next time, Happy Crafting!

Donna

**Challenges Entered:


Thursday, September 1, 2022

The Four Seasons Challenge - Autumn Month 1

Hello Friends and Happy 1st Day of September!  Today begins a new challenge at The Four Seasons Challenge Blog and our inspiration prompt is Autumn themed. 


I recently received the Fall Foliage Layering Stencil Kit and Coordinating Die set from Pink Fresh Studio.  This is a great stencil set, even though it's named Fall Foliage, it's actually so versatile.  The stencils are easy to layer and the combinations of colors you can create are limitless.

I knew right away I wanted to create a Wreath so I proceeded to stencil and die cut several leaves in various colors.


The card measures 5.5" square and the polkadot patterned paper is from the Bo Bunny "Vintage Polkadot" 6x6 paper pad.  I've has this paper pad in my stash for a few years and I hoard this paper, I love it and it's hard for me to use it.  Do you hoard paper like I do?

I die cut a circle and stamped the sentiment, then added craft foam behind as I planned to elevate it; I needed the ground clearance to tuck all the leaves in.


I wanted an extra full wreath; hence the amount of leaves.  After getting everything adhered, I added a Baker's Twine Bow and some gold gems.  I hope you'll stop by the challenge blog and see the lovely projects my teammates have created this 1st challenge of Autumn.  I hope you'll play along too!

Until next time, Happy Crafting!

Donna

**Challenges Entered:
AYLI = fav base is square; I started papercrafting when we were stationed overseas and that was the shape everyone made so it has a special place in my heart.


Saturday, January 15, 2022

Altenew Academy Level 2 Course: Color Your Day

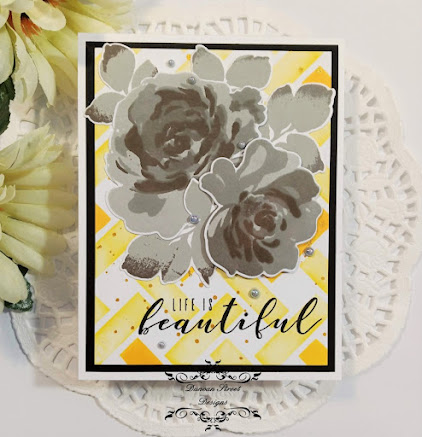
Hello Everyone, I'm back to share another Altenew Academy course project.  Today's card was created for the Level 2 Course:  Color Your Day.  This 6 part course covered techniques and ideas on adding splashes of color to projects for visual interest and fun.

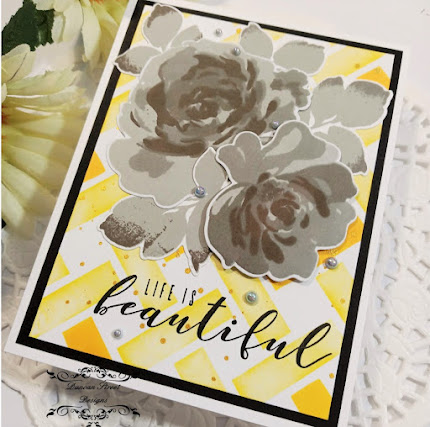
For my project, I've used the Altenew Fantasy Floral Stamp and Coordinating Die Bundle along with stenciling to create an interesting design.  My design was directly inspired by one of the projects the instructor, Therese Calvrid completed in the course.  


To begin my project, I considered a design for the background and the colors I wanted to use.  I decided upon a simple yet effective neutral focal with a bright background.  The floral set are layering stamps so using all 4 inks in the Altenew Gentlemen's Gray Crisp Dye Ink Mini Cube Set,  I stamped from light to dark, building up the colored layers.  I die cut the florals and leaves with the coordinating dies and set aside to prepare the background.

Using a light shade of yellow ink, I blending over the entire stencil then came back with a darker shade of yellow and blended in a few areas.  If you'll notice, I varied my pressure when blending the light yellow so I would get the look of using more than 2 inks; parts of the lighter color is even lighter within the area and that was due to the pressure I applied when blending.  Once I was happy with the stenciling, I splattered the panel with Gold Watercolor Paint and set aside to dry.


Once the panel was completely dry, I stamped the sentiment from the Altenew More Than Words Stamp Set.  In hindsight, I should have stamped the sentiment prior to splattering with the gold watercolor but as it happened, there were no splatters where the sentiment was stamped.  That was pure luck and next time, I will stamp the sentiment prior to splattering.

To complete the card, I adhered the stenciled panel to a black mat, arranged the florals and adhered to the panel flat using liquid adhesive; only popping the front floral on craft foam.  Gray Opal Pearl Embellishments from Kat Scrappiness were added for additional interest.

This was a fun course and I thoroughly enjoyed it.  It's fun to experiment with color in your designs; I wouldn't have thought to use florals in a neutral color but in doing so, the bright background made those florals Pop off the page, even if they are gray.

Thanks for stopping by, I appreciate your visit.  Until next time, Happy Crafting!

Donna

**Challenges Entered:

Wednesday, June 16, 2021

We Make a Great Pear

Hi Crafty Friends and Welcome to Wednesday!  I have a quick post today that features Fruit, Stenciling, Ink Blending and Layered Stamping.

For my card today, I stamped 2 Pears from the Simon Says Stamp Organic Fruits stamp set with inks from Catherine Pooler.  The Sentiment is part of a mini stamp and die set from the Spellbinders Market Fresh by Debi Adams "The Pearfect Avocado" Stamp and Die Set.  


I like the stamp set because the fruits are supposed to appear whimsical; the ink layering is not meant to match up perfectly, giving it an organic and whinsical feel.

I stenciled the background with an Alina Crafts stencil, fussy cut the images, popped the front Pear and panel on foam pads for dimension, splatteredwith White Acrylic Gloss Spray by Dina Wakley and added clear sequins for sparkle. 

Thanks for stopping by today.  Until next time, Happy Crafting!

Donna

**Challenges Entered:
A Place to Start - Card, Thinking of You or Encouragement, Stenciling


Wednesday, June 2, 2021

Masculine Birthday

Hello and Happy Wednesday!  Today is the 1st Wednesday of the month and it's time for a new monthly challenge at the Paper Funday Challenges.  As always, the theme is Anything Goes with the Optional Twist this month of Sparkle and/or Shine.

The sponsors for this months' challenge are the wonderful Jan's Digi Stamps and Colour of Love.  For my design team project, I decided to go with the Twist and create something featuring Sparkle and/or shine...and I chose Shine.


I need masculine cards in my stash (don't we all) as I just don't think of making them and thought how can I create a masculine card that sparkles and/or shines.  I sat down and went through my dies and stamps and BINGO....I can make it shine!

I stenciled a background using Vintage Photo Distress Oxide Ink and stamped the Timepiece image; which is an old stamp I no longer have the package for so unsure of the maker, tore the edges of the panel and place foam pads behind.  Still needing shine, I die cut gear pieces from gold mirror card and placed flat on a mat of wood patterned paper from P13, then adhered all to a mat of gold mirror card.  I heat embossed the sentiment using fine detail gold powder and out the design all together.  

I felt like the card needed something else and I'm a fan of bells and whistles but on a masculine card, I thought "what can I use?" then it came to me, the circle bits from the middle of the gears.  I adhered to the focal panel and they look like brads.  

Please join us at The Paper Funday Challenges, we hope to inspire you with our designs and look forward to seeing your creations.

Until next time, Happy Crafting!

Donna

**Challenges Entered:
Clever Dexter - favorite techniques are heat embossing and ink blending


Saturday, April 17, 2021

Thanks Ever So Much

Hello and Happy Saturday!  Today was a rainy day here in Central Florida so I spent the day in the craft room and re-discovered a technique that I had forgotten about.....Stenciling on Vellum.


This Sweet and Simple card started with stenciling on a piece of vellum.  I die cut a frame and placed the stenciled image against a piece of white card and adhered the frame around the image.  Mounted the stamped sentiment on foam pads and added irridescent sequins as a finishing touch.

The stencil and sentiment are from a box of crafty goodies I purchased at a Church Bizarre so they are unbranded...or at least to me as they do not have the original packaging.  I used Distress Oxide inks to stencil and thoroughly allowed to dry so no smudging would occur when I placed ink side down.

I like the soft look of this piece and I will try this technique again soon.  Until next time, Happy Crafting!

Donna

**Challenges Entered:


Saturday, April 10, 2021

Slimline Stenciled Birthday

The weekend is here, Happy Saturday!  Today's make and share is a traditional sized Slimline Birthday card featuring stenciling, stamping, heat embossing and coloring.


I wanted to create a traditional sized slimline (4"x8") card for my newest crafty items, a Bo Bunny Wildflowers Stamp and Vintage Screen stencil from Fun Stampers Journey.  I started with a stenciled panel created using Worn Lipstick, Festive Berries and Squeezed Lemonade distress oxide inks and a light hand.  I stamped and heat embossed the image over top and colored in with Spectrum Noir Alcohol markers along with the sentiment, which is from a Kelly Creates set.  Lastly, added yellow sequins for that bit of sparkle that I must have!  

Until next time, Happy Crafting!
Donna

**Challenges Entered:

Sunday, April 4, 2021

Happy Easter Sunday

Good Morning and Happy Easter.  Today's make and share features stenciling, ink blending, heat embossing and stamping.


I created a background using Distress Oxide Inks in tones of yellow and a sun rays stencil.  The stamps are from the Gina K. Designs Birds & Blossoms 2 stamp set, which I heat embossed.  Added faux pearls for interest and this card is complete.  

Have a Blessed Day and until next time, Happy Crafting!

Donna

**Challenges Entered:


Saturday, April 3, 2021

XOXO

 Hello and Happy Satur-YAY!  Today's make and share features ink blending, stenciling and die cutting.


I stenciled over a 3.75"x5" panel with a stencil and distress oxide inks.  I added a simple sentiment with die cut letters and sequins for a bit of shine.  My version of a Clean and Simple card but I call it a Sweet and Simple card because of the colors added and not much white space.

Have a wonderful day and until next time, Happy Crafting!
Donna

**Challenges Entered:


Monday, March 22, 2021

An Ink Blended "Hello"

Happy Monday!  Today was a busy day but I managed to create this simple yet colorful ink blended card using a Tim Holtz Flowering Stencil, Distress Oxide Inks and a Die Cut Sentiment.


I love this stencil however it doesn't cover the entire front of an A2 sized card so I made a panel from it and mounted on a black mat.  I ink blended with Wilted Violet, Faded Jeans and Twisted Citron Distress Oxide Inks and cut the "Hello" from a die I have in my stash.  I die cut 3 times and layered them to give a chipboard-like thickness.  The final touch was adding sequins from the stash.

Until Next Time, Happy Crafting!
Donna

**Challenges Entered:


Friday, March 12, 2021

Find Your Song

Good Day and Happy Fri-YAY!  The week flew by and we're counting the Days until Spring.  Today's make and share is my take on a Simple Design and features ink blending with simple stamping.  


I wanted to create a simple card where the ink blending was the star.  Using a stencil and Distress Inks, I created a soft sky full of fluffy clouds.  I stamped a Cherry Blossom Branch and bird with a sweet sentiment - all from an older Gina K. Designs Stamp Set titled "Birds & Blossoms 2".  I'm not certain if the set is still available for purchase on the Gina K. Designs online shoppe, I purchased throught eBay.

Have a blessed day and great weekend and until next time, Happy Crafting!
Donna

**Challenges Entered:


Thursday, November 12, 2020

Merry Christmas Gnome

 Hello!  Today's make is a Card with a Tag on Top, featuring a Gnome, Foil, Glitter, Flock, Die Cuts and Stenciling. 


To create my card, I started with the tag first.  I used the Gina K. Designs and Thermo Web "Gnome for the Holidays" Stamp and Stencil Kit.  This kit was a collaboration between Thermo Web and Gina K. Designs and includes Foils, Stamps Stencils and Dies.  

The designer papers are a mixture of scrap and a large panel from the Memory Box "Christmas Plaid 6x6 paper pad, the Gnome beard is White Flocking, the baubles in the trees are die cut from red foil and the starry background is Cosmic Shimmer Sparkle Texture paste over a stencil. 

For a final touch, I added a bit of ribbon, attaching it to the tag with my Tim Holtz Tiny Attacher and covering the staple with the sentiment strip.

Christmas crafting has begun and if I stay on track, I won't be pulling my hair out come December 15th...the day I give myself to have all cards in the mail.

Until next time, Happy Crafting!
Donna

**Challenges Entered:


Tuesday, September 29, 2020

Ghostly Greetings

 Hello and Happy Tuesday.  The day is marching right along, I thought I would take a minute to post my make and share for today.  This A2 card features some ghosts from the recent Gina K. Designs Fall Release which can be found here.  At the time of this post, the kit is sold out but next month, the stamp set featuring the ghosts will be available on it's own; it's titled Haunts and Harvest.


The ghosts are too cute to spook, I think it's their whimsical eyes...they just make me smile.  I created a background panel with an old stencil and some distress oxide inks.  I stamped, heat enbossed and die cut the ghosts, popped them up on fiam pads and placed on a die cut circle I thought resembled a spooky harvest moon.  The designer paper strip is from the DCWV "Witches Brew" 6x6 Mat Stack.  Lastly, I stamped and heat embossed the sentiment (which is part of the Haunts and Harvest stamp set) with a ghostly white powder.  Scary indeed!   Well.....not too much.

Until next time, Happy Crafting!

Donna

**Challenges Entered:


Monday, August 24, 2020

Happy Sushi

 Today's make and share features images and sentiment from the new Gina K. Designs stamp set I Like the Way You Roll, alcohol marker coloring, stenciling and heat embossing. 


The happy Sushi and chop sticks were heat embossed with black embossing powder and colored with Spectrum Noir Alcohol Markers, then cut out with the matching dies.  I  arranged all on a small focal panel along with the stamped sentiment, which makes me laugh every time I read it!  

I stenciled another piece of card with the Fizzy Stencil, which is also new this month from Gina K. Designs, using Pumice Stone Distress Inks and a very light touch. I wanted everything to POP so I backed with black card.  For the final touch on this A2 sized card, I added clear sequins for that bit of sparkle and placed the Sushi on an Action Wobble so he or she will dance and wiggle.   

I think this Sushi is so stinkin' cute and the stamp set has other Sushi inspired images and lots of funny sentiment puns, which makes this set adorable.  

Until next time, Happy Crafting!

Donna

**Challenges Entered:
Pixie's Crafty Workshop - Yes, playing for the Prize