Showing posts with label Tim Holtz. Show all posts

Friday, June 17, 2022

I'm Happiest When I'm With You

Hello and Happy Friday!  Father's Day is fast approaching (here in the States, it's this Sunday, the 19th of June) so I've had a play with a bit of ink and stenciling to create a Vintage Tag.  

I'm not great at creating Vintage or Shabby Chic themes but I've had the Tim Holtz Paper Dolls in my stash for a long time, so I thought to myself "a challenge is a good thing"..and it helps creativity.


Using a Mixed Media Tag from Joggles, I ink smooshed Distress Inks in shades of Blue and Brown to layer some color.  In between dries, I stamped clock and text images using the same distress ink colors.  I also stenciled splats and drips.  


I've fussy cut clock and timer images from ephemera I have in my stash and adhered to the tag, as well as washi tape.  I've adhered the paper dolls flat and traced around with a fine liner black pen, then adhered quotes from the Tim Holtz Small Talk Sticker pack.  Lastly, I tied some seam binding, thread and twine to the tag and called it complete.  

I will give this to my hubby for Father's Day, the back is blank and ready for a sentiment.  Maybe he will hang it from the rear view mirror in his truck.

Until next time, Happy Crafting!

Donna

**Challenges Entered:

Sunday, June 6, 2021

You're a Limited Edition

Hello and Happy Sunday!  I trust you've had an enjoyable weekend thus far.  Today's make and share features watercolor, stamping, butterflies and heat embossing.


This card measures 5" square and I started with watercoloring a panel of Tim Holtz Watercolor paper with Salty Ocean and Cracked Pistachio Distress Inks.  After fully drying, I stamped butterflies from the Gina K. Designs Beautiful Butterflies Stamp set using Sea Glass Dye Ink, also from Gina K.  I was going for a monochrome background with a large focal Butterfly, which I heat embossed with Fine Detail White Powder.  

I wanted more texture to the piece so I inked the edges with VersaMark and sprinkled Oceanic Embossing Powder from WOW!  Happy with the edges, I mounted the panel on foam strips and placed on the card base.  The sentiment strip is a CZ Designs from Simon Says Stamp and lastly, placed clear water droplet gems for additional texture and interest.

Until next time, Happy Crafting!

Donna

**Challenges Entered:
Stamping Sensations - It's hard to pick 1 fav technique but I do love heat embossing


Tuesday, May 25, 2021

Have a Lovely Day

Hello and Happy Tuesday!  Today's make and share is a quick one featuring a stamped image from the stamp set included in the Spellbinders Card Kit of the Month for April 2021.  The kit is titled Sincerely Yours and contains lots of great die cuts, ephemera, dies, cardstock, sequins, foam pads, double sided tape and a stamp set.


I wanted to keep the design fairly CAS so I stamped the image and colored very basically with Spectrum Noir Alcohol Markers.  I then Die Cut with a small postage stamp die and mounted the image on foam pads.  I layed down some washi tape from my stash, stamped the sentiment and cut with a circle die, adhered to a piece of torn vellum.  Using my Tim Holtz Tiny Attacher, added some mini staples, popped on foam pads and added to the card with sequins for shine.  Finishing up, I mounted the entire panel on double sided fun foam and placed on the card base.  

Until Next Time, Happy Crafting!

Donna

**Challenges Entered:


Monday, May 17, 2021

Inspiration Station Challenge #6

Hello and Happy Monday!  I trust your weekend was lovely and you enjoyed some time outdoors.  Today starts a new challenge at Inspiration Station and the inspiration photo is:


When I first saw the inspiration picture, I thought Vintage but I'm rubbish at Vintage, Shabby Chic or anything related to that style.  I'm all about color and my projects over the years certainly reflect that so I had to put my thinking cap on.  I came up with this:


I had a snippet of card left, from another project, that has a musical note design (and now that I look at it here, it appears I've placed it upside down - LOL) that became the base layer, I stamped, heat embossed, die cut, and ink blended over whimsical floral images from a Woodware Set and arranged a small cluster.  The sentiment strip is from the Tim Holtz Small Talk strip set.  

Please join us at The Inspiration Station this round, the challenge ends 06 June 2021 so there is plenty of time to get creative.  Until next time, Happy Crafting!

Donna

**Challenges Entered:


Sunday, May 2, 2021

This is to Certify Happiness

Hello and Happy Sunday!  I hope your day is running smoothly.  Today, I needed a quick card so I had a play with watercolors, Strathmore 500 Series Ready Cut paper, dimensional die cuts and background stamps.


I literally put this card together in minutes using snippets of things I had in my stash.  I started with a watercolor smooshing technqiues using Arteza Real Brush Markers.  I stamped over the dried background with Bo Bunny and Indigo Blu texture stamps using distress inks.  I found floral dimensional ephemera I had stashed in a drawer and used a large one for the focal.  For the sentiment, I used 2 snippets from the Tim Holtz Clipping sentiment pack.  

The card is now tucked away in an envelope, ready to be posted tomorrow.  Sometimes, I work better under pressure!  

Until next time, Happy Crafting!

Donna

**Challenges Entered:


Tuesday, April 20, 2021

Live Simply...Give Generously

Hello and Happy Tuesday.  Today's make and share features a lovely floral image and alcohol marker coloring.  This gorgeous image is a digi stamp from Power Poppy; I LOVE their Florals and I couldn't resist coloring this one up for a sweet and simple card.


I colored the image with Spectrum Noir Alcohol Markers, the sentiment strip is from the Tim Holtz "Small Talk" strip die cut pack and sequins from my stash.  I strayed away from patterned papers in today's project as I wanted the floral image to be the star.  I love this image, it's so versatile and wonderful for any season.

Until next time, Happy Crafting!
Donna

**Challenges Entered:


Monday, March 22, 2021

An Ink Blended "Hello"

Happy Monday!  Today was a busy day but I managed to create this simple yet colorful ink blended card using a Tim Holtz Flowering Stencil, Distress Oxide Inks and a Die Cut Sentiment.


I love this stencil however it doesn't cover the entire front of an A2 sized card so I made a panel from it and mounted on a black mat.  I ink blended with Wilted Violet, Faded Jeans and Twisted Citron Distress Oxide Inks and cut the "Hello" from a die I have in my stash.  I die cut 3 times and layered them to give a chipboard-like thickness.  The final touch was adding sequins from the stash.

Until Next Time, Happy Crafting!
Donna

**Challenges Entered:


Saturday, August 18, 2018

Sunshine - Sketch Saturday Challenge Blog

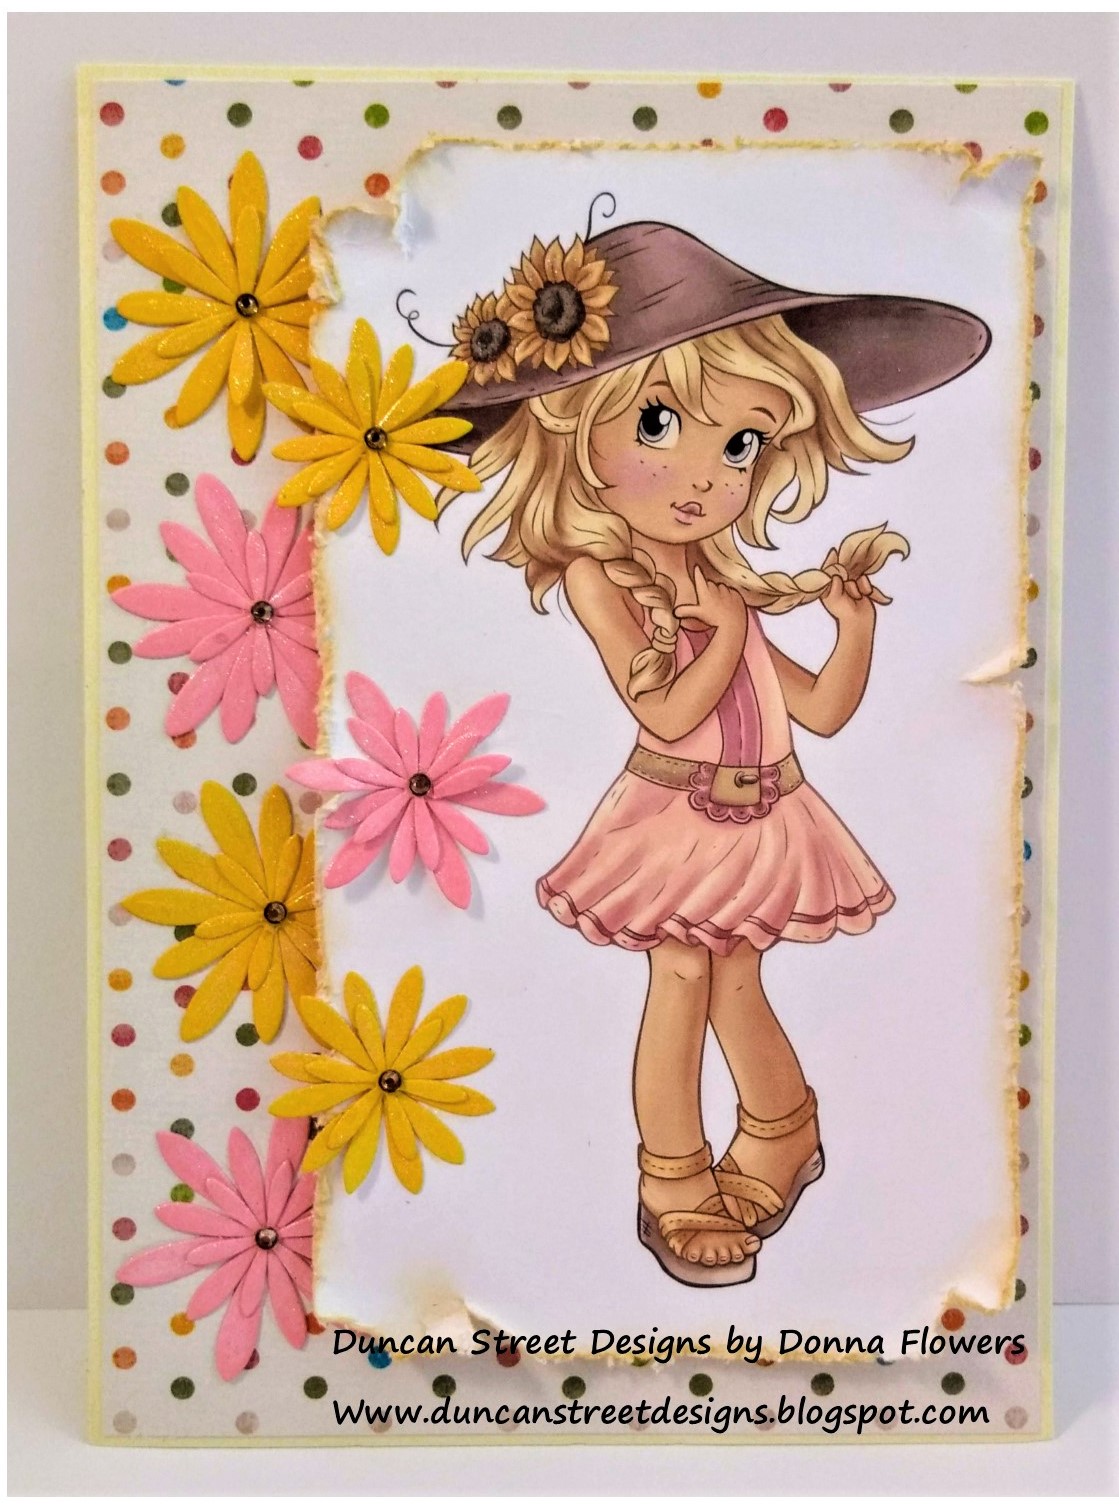
Hello and Happy Saturday!  Today I'm sharing my 3rd project as Guest Designer for the month of August on Sketch Saturday.  The image I used is Sunshine from The Paper Shelter who is the sponsor of the challenge this week.


The image was pre-colored so it made for a quick card.  This image is so sweet and the color combo was perfect and easy to match up with the papers I had in my stash. 

For the challenge, there was also a sketch to follow:


I decided to add the flowers, following the sketch as closely as I could. I distressed the edges of the focal image with a Tim Holtz Paper Distresser and inked the edges with Tea Dye Distress Ink.  The polka dot patterned paper added just enough visual imagery for her.  

I'm pleased with how Sunshine turned out and I hope you've been inspired to visit Sketch Saturday and join the fun.

Until next time, Happy Crafting!

Donna

** Card Entered in the following challenges:


Thursday, July 5, 2018

Cardz 4 Galz Challenge #75

Hello and Happy Thursday to you and yours!  I hope your 4th of July holiday was fun and you're enjoying a day of crafting or whatever makes you smile!

Today I'm sharing my Design Team project for Card Challenge #75 at Cardz 4 Galz.  The challenge starts today and runs for 2 weeks.  The theme is "For a Little Girl" and I think this sweet Teddy digital image from the wonderful Hetty Clare Designs on Etsy fits the theme perfectly.


Please join us at Cardz 4 Galz for the challenge and have some fun creating your project for the theme.  

Thanks for stopping by and I hope you were inspired.  If you were, would you please consider following my blog?  

Until next time, Happy Crafting!

Donna

Thursday, June 28, 2018

Creative Knockouts Challenge - Bow Beautiful

Hello Crafters and Happy Friday Eve!

Today I'm sharing my Design Team Project for the Creative Knockouts Bow Beautiful Challenge this week.  It's Challenge # 251 and Star Stampz is the Prize Sponsor.

Star Stampz provided me with the cute image "Balloons and Ice Cream" to use for this challenge.  I colored her up with Sepctrum Noir Markers and decided a Birthday Card was in order...the balloons and ice cream just reminded me of a birthday!


To finish off, I added a few clear sequins and a lace border die cut I colored with Wilted Violet Distress Oxide Ink.

I hope you'll stop by Creative Knockouts Challenge this week and participate in the challenge.  Also, visit Star Stampz for a peek at what you could win.

Thanks for visiting today and until next time, Happy Crafting!

Donna

**Card entered in the following challenges:  Polka Doodles Challenge Week #25QKR Stampede #301, Colour Crazy Challenge Week #25, CardzTV Challenge #53Crafting with Friends Challenge #70

Tuesday, May 29, 2018

A Vintage Birthday Wish Card with Matching Box

Hello Everyone!  I hope all is well with you and yours and you enjoyed a wonderful Memorial Day Holiday.

Today I have another card with matching box to share with you.  This matching set has a Vintage feel; card measures 4.25" x 5.5" (A2).


Vintage and Shabby Chic are my absolute favorite to create.  I feel I'm better at creating Vintage but I still try with Shabby Chic.  This card was created with Prima Love Notes Papers, flowers and leaves from Wild Orchid Crafts, die cuts and ribbon from my stash.

The base is kraft colored cardstock from Recollections.  I have inked the edges with Vintage Photo Distress Ink and colored the lace die cut mat with Tattered Rose Distress Ink.  I then spritzed the card with Glimmer Mist for some sparkle.

The matching box is simple in it's design and decoration.  Covered with the same Prima Love Notes designer paper and a ribbon from my stash to be used as a closure.

The box measures slightly larger than the card for a nice fit.


I hope you enjoyed my project today.  I have one more matching card and box to share, then it's Masculine Cards for Father's Day.

Till Next time, Happy Crafting!

Donna


Wednesday, May 16, 2018

Create Your Own Backgrounds

Hello Everyone.  I hope you are well and happy!

Today I would like to share some cards I created using the Tim Holtz Distress Inks and water to create some gorgeous backgrounds for cards.  The cards are A2 size (4.25" x 5.5").


This 1st card was created using an unbranded Star die I purchased from AliExpress and Distress Inks in the following colors:  Candied Apple, Abandon Coral and Barn door.  I used an Embossing Folder with a Star pattern and my Cuttlebug to dry emboss the top mat which measures 4" x 5.25".

I placed the 3 inks on my craft mat at spritzed each with some water.  I then placed the white card on top of one color to pick up some color, rotated the card and placed on another and so on.  I dried with my heat tool and repeated the process until I was happy with the result.

I used the "left over" piece of star from the die cutting process to pop up on foam and placed in the middle of the cut out for some dimension.  I heat embossed the sentiment on Vellum, for the finishing touch and sparkle I added clear sequins here and there.


The 2nd card was a bit simpler in design using an unbranded dies from AliExpress and Distress Inks in the following colors:  Seedless Preserves, Peacock Feathers and Aged Mahogany.   I heat embossed over the word Lovely with Ranger Black Embossing Powder for some shine and thickness.  For the finishing touch, I used Tonic Nuvo Drops in Crystal for some interest.  


If I may say so myself, this is my favorite of the group!  This time I used the Distress Inks in the colors Salty Ocean, Peacock Feathers and Chipped Sapphire to create this awesome background.  I ran the card mat through the Cuttlebug using an Embossing folder with a Burst pattern.  I die cut the middle and the dimensional piece with 2 unbranded dies from AliExpress.  The Dream wording is also an unbranded die that I heat embossed with Ranger Black Embossing Powder.  I again used Nuvo Drops in Crystal to add some interest. 


Last but not least, I wanted to see how the colors would look against a Kraft colored card.  The Distress Colors I used here were:  Mowed Lawn, Tea Dye and Spiced Marmalade.  I cut 1/2 inch strips and die cut a circle for the focal point.  The front of the card was embossed using an embossing folder with dandelion images.

The flower die cut was colored using Tim Holtz Distress Oxide Inks in the colors Spiced Marmalade and Peeled Paint.  The sentiment was heat embossed with Ranger Black Embossing Powder.  I finished the card by placing Nuvo Drops in Bronze around the card.


I hope you enjoyed today's blog post and until next time, Happy Crafting!

Donna

** I support the following challenges:  CardzTV Anything Goes Challenge #48CardzTV Anyting Goes Challenge #49


Monday, May 14, 2018

Anna Griffin Shabby Chic and Vintage Card Set

Hello Everyone and to all the Mothers out there...I hope your day was extra special!

Today I am sharing a set of 4 note cards I created using Anna Griffin Designer Papers, Vintage Flowers and Butterflies.  I used my Cricut Access to purchase the images, then printed and cut them to use for my card fronts.  One of the note cards has a little Song Bird ephemera image from K & Company.  For all the cards, I used photopolymer stamps from CardzTV Stamps.


These beautiful cabbage roses are some of my favorite images.  I added some pink lace and Nuvo Drops to simulate pearls.


This little Song Bird is so sweet.  I used a circle die to cut out a circle for the focal images, inked the edges of the papers with Tim Holtz Tea Dye Distress Ink, used Nuvo Drops to simulate pearls and finished off with seam binding tied into a bow.


I feel this card has such a dramatic coloring scheme and is quite eye catching.  Anna Griffin Vintage Floral images are so lovely.  

This card has a bit more embellishment.  I used two different dies for the main focal point mat and the sentiment scalloped ovals.  I added some lace and faux pearls (not Nuvo Drops this time).  I inked all the edges with Tim Holtz Tea Dye Distress Ink and finished with a spray of Shimmer Spray Glitz.  


Last but not least, I went with a Butterfly for this card as I felt I had 2 florals and 1 bird so I needed a butterfly to finish the set.  This Butterfly image is another Anna Griffin image that I purchased from Cricut Access.  I used satin ribbon, a die cut for the focal image to rest on and some fauz pearls.  For the finishing touch, I spritzed with some Shimmer Spray.


I hope you enjoyed my note cards and the lovely images from Anna Griffin as well as the stamped sentiments from CardzTV.  I had so much fun creating these cards and they are currently available for purchase so Please visit my Etsy Shoppe for this card set.

Thank you for visiting and until next time, Happy Crafting!

Donna

** I support the following challenges:  CardzTV Anything Goes Challenge #49

Wednesday, May 9, 2018

Celebrate You Today

Hello Everyone, I hope everything is well with you and yours. 

Today I want to share a quick Birthday card I put together.  I mentioned in an earlier blog post that I was running low on Birthday cards so I'm dedicating most of my time this week to creating cards for birthdays.  

This is a standard card measuring 4.25" x 5.5" (A2).  I used Tim Holtz Distress Oxide Inks in the colors Twisted Citron and Broken China to create the background color on the embossed card mat.  I cut a piece of Vellum 1" wide and heat embossed the sentiment "Celebrate You Today" using a Ranger Embossing Pad and Ranger Fine Black Embossing Power.  The Balloon die cut is an unbranded die I purchased from AliExpress.  I added clear sequins for a bit of bling!

**Hint for heat embossing on Vellum:  apply the heat from the back in short bursts.  This will prevent buckling and wrinkling of the vellum.


A Quick, Simple and Effective Card.  


Thanks for visiting and I hope you'll stop by again for another blog post.  Take care and until next time, Happy Crafting.

Donna

** I support the following challenges:  CardzTV Anything Goes Challenge #46Crafty Cardmakers Challenge - No Patterned Paper

Monday, May 7, 2018

Birthday Splash Out

Hello Everyone!  I hope all is well with you and yours.  My stash of cards is getting very low and I like to keep cards on hand so I'm prepared.  I'm in desperate need of Birthday cards so I decided it's no time like the present to get some cards made.

Recently I ordered a copy of the U.K Magazine Papercraft Essentials from More Mags.  Included in Issue 158 was an adorable stencil, die and stamp set featuring a frog, duck, water puddle, Wellingtons, sentiments and more.  The set was designed by Crafti Potential and is just fun!

The card measures 5.5" x 4.25" (a standard A2 card) in a landscape format.  I colored the images with alcohol markers, used a circle die to create an opening on the mat for the Pond; using Tim Holtz Distress Oxide ink in the color Salty Ocean to color the pond.  I fussy cut the frog and Wellies, die cut the puddle and droplets with the dies included in the magazine purchase.  I think Mr Frog turned out great and the card was given to a co-worker for her birthday.  She thought it was cute!

Thanks for visiting and till next time, Happy Crafting!

Donna


Friday, May 4, 2018

Havana

Today I would like to share a card I created using the Havana papers from Prima Marketing, Inc.  This is a lovely paper pack with soft, pastel colors and wonderful images.  I'm not sure how to describe this card; I want to call it an Easel card however it's not like a standard Easel.

This is a standard A2 size card (4.25" x 5.5").  I used an unbranded die for the clock image and circle background; added color with alcohol markers.  I then added die cuts of dandelions  inside and inked them with Tim Holtz Distress Oxide ink in the color Peacock Feathers.


The colors are soft and shabby chic.


I created a tag and used an unbranded stamp for the sentiment.  I purchase many of my unbranded dies and stamps from AliExpress.  I have been pleased with everything I have received from AliExpress thus far.  When you're on a budget, AliExpress is kind to the pocketbook.


All You Need Is Love....this is yet another unbranded stamp from AliExpress.  I love the meaning behind the sentiment and thought it matched the beauty of the Havana papers.  

I hope you enjoyed my card today.  Till next time, Happy Crafting!

Donna


Wednesday, April 25, 2018

A Wooden Crate of Daisies


Hello Everyone!  I hope all is well with you and yours.

I love box cards and when I came across the tutorial for this sweet wooden crate of daisies I couldn't resist creating it myself.

The tutorial can be found on the Mixed Up Craft Site here:  Daisy Week.  This lovely lady has a wonderful talent for creating unique fold projects and this daisy box is no exception.  I followed her instruction but added my own spin on things.

I used beige 110 lb. cardstock for the crate base and sent the strips through the Cuddlebug using a wood grain embossing folder.  I inked the strips with Tim Holtz Distress Ink in Vintage Photo.  For the flowers, I used an unbranded daisy die set I purchased from AliExpress and hand cut the stems from green cardstock.  The stems were a little too flimsy for my liking so I glued strips of paper together to give the stems some strength.   I colored the centers of the flowers with a yellow alcohol marker (Ohuhu Markers on Amazon).

I cut a circle using an unbranded circle die set I purchased on AliExpress and stamped a sentiment from the Scrapbooking Queen for the front of the box card.  I needed a place to write a sentiment so I cut out 2 mats, inked the edges with Vintage Photo, stamped the sentiment from a CardzTV Stamp Set and attached to the back of the flower crate.


This lovely daisy crate can be used as a shelf or desk sitter; it will also fold flat for mailing.  It will fit into a stand A2 card sized envelope.

I hope you enjoy my post today.  Till next time, Happy Crafting!

Donna

**I support the following challenges:  Always Happy Birthday May ChallengeCreative Knockouts Card Challenge - Friendship

Thursday, April 19, 2018

Graphic 45 Botanica Bella Note Card Set

I love paper, all kinds of paper and especially vintage, shabby, old world paper.  I'm a huge fan of Graphic 45 and put several of the G45 collections on my Christmas Wish List last year.  I was blessed with the Botanica Bella Deluxe Collectors Edition and I just broke into it last month.  I wanted to use it but just couldn't make myself open that glorious paper pack...you know the feeling...like when you break a $20 bill....it's gone in no time.

I created the cards by adding different elements such as ribbon, brads, buttons, die cuts, and distress inks.  They turned out lovely, a couple of the cards could be considered masculine.  

I left sentiments off the fronts except for 1 card, the insides are also without sentiments so they could be used as note cards or I can stamp a sentiment if requested.

This set is listed in my Etsy Shoppe, thanks so much for stopping by today.  

Till Next Time,

Donna