Showing posts with label Heat Embossing. Show all posts

Saturday, December 20, 2025

Sparkling Season

Hi Crafty Friends and Happy Saturday!  I have a quick share for you today, but before we get to my holiday card, I want to announce a New Challenge that will be starting on the 20th of January 2026.  It's The Pick 3 Challenge. Please check it out, be sure to follow, spread the word and get ready to play along!

My card today is another fairly CAS design, using the Sparkling Season Stamp Set from Gina K. Designs.  This set was a Simon Says Stamp Stamptember offer a few years ago and it's a timeless holiday set.


I started with heat embossing the images and sentiment on Stampin' Up Blackberry Bliss card using Ranger Fine Detail gold embossing powder.  I've back the focal panel with gold mirror card and adhered to a Blackberry Bliss card base.


I use this set every year for at least 1 Christmas Card, I love the nostalgic feel of the baubles, the sentiment font and the elegant gold and blackberry together.  

That's all for today, so until next time, Happy Crafting!

Wednesday, September 4, 2024

Paper Funday Challenge #69 - September 2024

Hi Crafty Friends and Happy Wednesday!  Today begins a new challenge month at The Paper Funday Challenge Blog.  Our generous sponsors this month are A Colorful Life Designs and Simon Says Stamp, our optional Twist is:  Create Your Own Background.

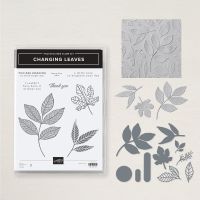
For my team project, I've decided to go with the optional Twist and create my own background, so I've used the new Stampin' Up Changing Leaves Bundle, which includes a gorgeous 3-D embossing folder, stamps and dies. 


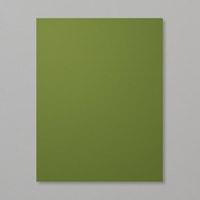
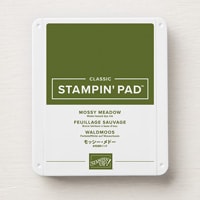
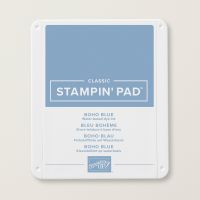
To start the background, I've embossed a panel of Mossy Meadow cardstock with the 3-D embossing folder and stamped a snippet of Boho Blue card with leaves. I then stamped and die cut the large leaves for the arrangement.


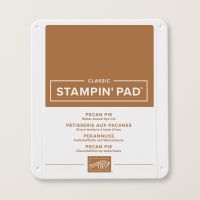
I've heat embossed the stamping on the blue leaf using fine detail white embossing powder, the leaf in back has been stamped using Pecan Pie ink on Basic Beige card.  The arrangement was added to the card front along with a twine bow.  The sentiment was stamped using Mossy Meadow ink and popped on dimensionals.  Lastly, gold gems were added for a bit of added interest.

We hope you'll visit us at The Paper Funday Challenge Blog this month and share your projects. I have listed the products I've used below.  Until next time, Happy Crafting!

Donna 

**Challenges Entered:
SU Only Challenges - Colors for Philadelphia Eagles - my husbands' fav team.  I prefer College ball


Product List
Find a Demonstrator:  Donna Walls - Florida

Friday, September 15, 2023

Beautiful Blossoms Challenge #9

Hello Crafty Friends and Happy Fri-YAY!  Today begins a new challenge month at The Beautiful Blossoms Challenge, where the FOCUS is always Florals with an Optional Mood board for inspiration.  The board this month contains rich autumnal colors:


My team project this challenge features the Beautiful Blossoms Stamp Set from Altenew, and a total coincidence to the name of our challenge.


To start, I've stamped these gorgeous florals on a panel of Kraft card and heat embossed using Fine Detail Copper embossing powder.  I've done a bit of coloring with Prismacolor Pencils and diluted inks.


I was careful with the amount of water I used to dilute the inks as the card panel is not paper made for taking loads of water.  I've matted and adhered to the Kraft Card base.  The sentiment, which is part of the set, was stamped using a deep red ink from Catherine Pooler and the strip was popped on craft foam for dimension.  Lastly, a few enamel dots were added for additional interest.

Please visit us at The Beautiful Blossoms Challenge and join in.  You'll definitely want to take a look at what my teamies have created, there's loads of inspiration waiting for you.

Until next time, Happy Crafting!

Donna

**Challenges Entered:
AYLI - Autumn because of Football, Bonfires, Camping and the start of the holiday season


Saturday, January 22, 2022

Altenew Academy Level 2 Course: Impressive Heat Embossing

Hello Crafty Friends!  Today I'm sharing a card created for the Altenew Academy Level 2 Course:  Impressive Heat Embossing.   I love to heat emboss so this class was right up my alley.  This course covered tips, tricks and techniques for adding heat embossing in ways that differ from the standard stamp and heat embossing method.  

For my card, I've used the Altenew "Here For You" Stamp and Coordinating Die Bundle to create a Sweet and Simple Card....my term for a Clean and Simple Card that had a bit more pizazz.


  1. To start my design, I stamped and heat embossed the large coneflower using watermark ink and fine detail Gold Embossing Powder.  The flower was cut using the coordinating die.
  2. Using Staedtler Watercolor Pencils, I've watercolored the floral and leaves then set aside to dry.
  3. To prepare the background, I created a frame using an Embossing Pen and Fine Detail Gold Embossing Powder.  TIP:  I scored the panel at 1/4" on each side before going over the line with the embossing pen. This created a "trough" and gave the embossing dimension.  
  4. The sentiment, from the same set, was stamped with watermark ink and heat embossed with the same gold powder.
  5. To create additional interest in the background, I splattered the card with water, sprinkled with powder and heat embossed again.  The powder will stick to the water droplets and this technique was one shared in class.  I never thought to use water instead of watermark ink to emboss with.
  6. Lastly,  I've adhered the panel to a 110 lb. card base, popped the floral on craft foam for dimension and placed it on the embossed panel.

This completes my class project and I'm impressed with the result.  The Altenew Academy classes have taught me so much and it's been a fun time learning so many cool tips and techniques.  I have 2 more classes to go before compeleting Level 2.  I'll be back with another AECP project soon.

Until next time, Happy Crafting!

Donna

**Challenges Entered:
AYLI - Favorite coloring medium is alcohol markers but my next fav is watercolor as in this project


Sunday, August 15, 2021

Seasonal Blooms

Hello Crafty Friends,  I hope the Sun is shining you today.  I recently received a parcel from Altenew containing some gorgeous products and this floral stamp was one of the items.


This image is part of the Seasonal Blooms Craft Your Life Project Kit and this kit was so popular when it was released, it literally sold out within minutes.  I had to sign up for email notifications and still had to wait for the second wave before I could get my hands on it.

The kit contains a stamp and coordinating die set, 3-D embossing folder and a 3 part layering stencil.  For my card, I stamped the image, applied Catherine Pooler Inks through the stencil and embossed a panel with the Altenew Enchanting Vines Embossing Folder.  Enchanting Vines is not in the kit, the folder in the kit matches the floral image and I will feature a card soon that uses the folder in the kit.


I used an embossing pen and fine detail gold embossing powder to add shine to the sunflowers.  Instead if using an anti-static power tool before embossing, I let the embossing power go where it wanted and got some gold flecks here and there.  Lastly, I've added Fire Flame Pearl Mix Gems from Kat Scrappiness for additional interest.  

Products Used:

from: ALTENEW

**Challenges Entered:

Saturday, August 7, 2021

Altenew Academy Level 1 Course: Irresistible Inking Techniques

Hello Crafty Friends!  Today, I'm sharing a card created for the Altenew Educator Certification Program, Level 1 Course:  Irresistible Inking Techniques.  This class shared great ideas for using inks in creative ways and I was inspired to dust off my Gelli Plate for some ink printing.

For my card, I've used the July Paint-A-Flower Fashion Monger Dahlia Stamp Set from Altenew for the focal on the card.  


To start my project, I inked up my Gelli Plate with various shades of greens, using a brayer for blending the inks.  After inking the Gelli plate, I laid my 8.5" x11" card over top and rubbed.  I did this process 3 times, building up the color.  I wanted pattern, so for the last press, I placed a vintage screen stencil on the inky gelli plate, laid my paper on, rubbed and the pattern was left.  I set this aside to dry thoroughly to work on the focal image.

I stamped the image with alcohol marker friendly ink and colored with alcohol makers.  The ink smeared in areas around the flower centers, which made me sad.  After looking at it and thinking I should toss it in the bin, I decided I could save it but using my embossing pen and gold fine detail embossing powder.  Tip:  Before tossing your project in the Bin, think of ways to save it.  


For assembly, I lightly inked an the area on the card base where the focal image would sit lightly with pink ink.  I fussy cut the floral image and adhered craft foam behind.  I splattered the inked card with White Acrylic Gloss Spray Ink and cut a banner panel, then adhered flat to the card base.  I placed the focal image and sentiment and lastly, added sequins for shine.  

This is the last class in the AECP Level 1 set of courses.  I now wait for my final assignment for Level 1 and if I'm fortunate, I will pass and be allowed to proceed to Level 2.  Fingers crossed please!

Take care and until next time, Happy Crafting!

Donna

**Challenges Entered:


Friday, July 23, 2021

Altenew Academy AECP Course: Let It Shine

Hello Friends!  Today I'm sharing 2 projects created for the Altenew Educator Certification Program Course "Let It Shine".  This course teaches tip and tricks for adding sparkle and shine to your projects.  If you know me, you know I LOVE sparkle...it's kinda my thing, so this course was made for me!

My 1st project features the Altenew Way Too Sweet Stamp Set, Alcohol Marker coloring, Patterned Paper and Glitter.

Adding loose glitter to a project is one of the many ways od adding sparkle and shine to a project.  I know loose glitter can be messy but in this instance, it wasn't at all.  I used very little loose glitter and that enabled me to control it.  

I started by coloring the images with alcohol markers and fussy cutting them.  Using a Sakura Quickie Glue Pen, I added liquid adhesive to the areas I wanted to add the glitter.  Using a Multi-colord glitter from Hobby Lobby and Fun Stampers Journey Sparkle Cuts, I adhered a small bit to the images.  To make certain all was adhered, I rubbed over the glitter with a piece of scrap paper, then set aside to dry.


Once dry, I created my layout using strips of patterned paper, black card and craft foam.  I love how sparkly the sweets are; the glitter makes them POP.

My 2nd project uses 3 different techniques of adding sparkle and shine; Heat Embossing, Glitter Tape and Glitter Gel.  


To start, I stamped and heat embossed the large floral bunch from the Altenew Dearest Friend
stamp set onto watercolor paper using fine detail gold embossing powder.  With Arteza Real Brush Markers, I watercolored the image and die cut with the coordinating die.  

To create my background, I cut two pieces of patterned paper from the Altenew Wildflower 6x6 paper pad and adhered to the card base with liquid adhesive.  I remembered I have glitter tape from Cricut, that I've had for ages, so I adhered a strip to separate the two patterned papers.


I stamped and heat embossed the sentiment; which is from the same stamp set directly to the card panel and mounted the focal image using craft foam.  Lastly, I added Stickles Glitter Gel to the edges of the florals and that completed this card.

With the heat embossing, glitter tape and glitter gel, this card is very sparkly but not overdone.  This was a great course, I picked up tips on techniques I already use and learned new techniques that I will be using on future projects.  

Thanks for visiting today.  I hope you'll try some of the techniques I've shared and comment below what techniques you use to add sparkle and shine to your projects.

Until next time, Happy Crafting!

Donna

**Challenges Entered:
Way Too Sweet Card:


Thank You Card:


Monday, July 19, 2021

Pammie's Inky Pinkies with CAS_ual Fridays

Hello Again!  Today begins a new challenge week at Pammie's Inky Pinkies and the sponsor this round is the generous CAS_ual Fridays Stamps.

For my design team project, I created a traditional sized slimline card using the "Floating" Stamp Set which is now retired.  The card measures 8.5" x 3.5".


To start, I stamped and heat embossed the Balloon image for an ink resist technique.  I blended Catherine Pooler Inks in the colors of Party Dress, Tiki Torch, Bellini and Limoncello.  Once dried, I rubbed the excess ink sitting on the heat embossing with a Microfiber towel.  


The sentiment is from the same set and stamped with Versafine Onyx Black Ink.  I mounted the sentiment strip on craft foam, matted the focal panel with black card and adhered to a card base of Neenah Classic Crest Solar White 110 lb. cardstock.  Lastly, I added enamel sparkle dots in the same shades as the inks.

Please join us this week at Pammie's Inky Pinkies!  Until next time, Happy Crafting!

Donna

**Challenges Entered:


Thursday, July 8, 2021

Krafty Chicks Challenge - Christmas

Hello Friends and Happy Thursday!  Today begins a new challenge at the Krafty Chicks Challenge Blog and I'm back with another Guest Designer project.  The theme this week is Christmas.

For my GDT project, I created a slimline card with lots of embossing and sparkle, perfect for the holidays!


My card features the Holiday Tapestry stamp set from Gina K. Designs and embossed using Sparkle White Embossing Powder from Simon Says Stamp.  It is truly hard to photograph the sparkle in this embossing but trust me, it's sparkly, glittery and just lovely.  I used Silver mirror card to create mats and a card base of 110 lb. Neenah Solar White Classic Crest cardstock.

Please join in the fun at the Krafty Chicks challenge this week.  We would love to see your holiday makes and inspire you with ours.  Until next time, Happy Crafting!

Donna

**Challenges Entered:


Friday, July 2, 2021

Altenew AECP - All About Layering 3

Hello Friends and Happy Friday!  Today I'm sharing my submission for the Altenew Academy All About Layering 3 course.  This course goes further in depth with instruction on multi-layer stamping and has lots of great tips and tricks to get a perfect layered image.

For my class project, I've used the new Altenew Bearded Iris Layering Stamp and Coordinating Die Bundle to create my A2 sized card. This is the newest set in the Build-a-Flower monthly subscription plan and it's a beauty.  

To start my card, I brought out the color wheel for a bit of color wheel theory on the design of this card.  I decided upon an Analogous + Complimentary color scheme.  For those not familar, Analogous are colors that are adjacent to each other on the color wheel and Complimentary are colors that are directly opposite each other.  So, my floral is stamp layered with Analogous colors and the background is a complimetary color.  


I stamped and heat embossed one of the iris images (this set contains 2 floral images) using embossing ink and Fine Detail Gold Embossing Power on Strathmore Watercolor card.  I started the stamp layering process with the other floral image in the set, first with the outline using black pigment ink and the layers using different shades of yellows and oranges.  The floral has 4 layers; the stem and leaf having 2.  The floral was a bit more intricate to line up but in no way difficult, just a bit of patience.


Setting aside the die cut floral, I watercolored the embossed panel with a light purple wash.  Purple is the complimentary color I mentioned earlier, it is complimentary to the yellow/orange floral.  With my heat tool and being careful not to skorch the embossing, I dried the panel thoroughly and adhered to the card base.  The sentiment was created using a manual Dymo Label Maker.  


The final touch to my assignment was adding faux lilac colored gems.  I hope you've enjoyed my post today, and appreciate you visiting.  Until next time, Happy Crafting!

Donna

Supplies Used:
Neenah Solar White Classic Crest 110 lb card base
Strathmore Watercolor Card
Catherine Pooler Inks
Versafine Pigment Ink
Versamark Embossing Ink
Ranger Fine Detail Embossing Powder
Gansai Tambi Watercolors
Art Glitter Glue Liquid Adhesive
Art Class Faux Gems
Dymo Label Maker

Challenges Entered:

Thursday, June 17, 2021

Lotus with Lots of Love

Hello Friends and Happy Thursday!  Todays card features Lotus Blooms, Lily Pads, Watercoloring, Die Cutting and a Gelli Plate Background.


I stamped, heat embossed and watercolored the Altenew Lotus from the Paint-A-Flower Stamp Set for June 2021.  I die cut the focal image and mat using the Essentials Diagonal Stitched Circles from Pink Fresh Studios and placed on a background I created last year using my Gelli Plate.  The sentiment is from the Lotus set and has been heat embossed with fine detail white powder from Ranger.  Lastly, cream twine and sequins were added for additional interest.

Thanks for stopping by!  Until next time, Happy Crafting.

Donna

**Challenges Entered:
Aud Sentiments
Outlawz Twisted Thursday
Cute Card Thursday
Sisterhood of Crafters
Happy Little Stampers Watercolor
Creative Moments
Creative Craft Cottage


Monday, June 7, 2021

You Are a Beautiful Soul

Hello...Me again, back with my last post for this busy Monday to let you know today begins Challenge #19 at Make the Cards and it's a color challenge this round.  I've been invited to be a Featured Creator and I'm honored to participate in this fun challenge.  Following are the colors for this week:


I intrepret the colors as Gray, Navy Blue, Light Pink and White.  I seldom use the colors together as I'm drawn to bold colors so it was a nice challenge to use them in a design. I started my A2 sized card by stenciling a mat of gray card using the "Fizzy" stencil and Denim Blue Dye Ink from Gina K. Designs.  I set the panel aside to dry and proceeded to stamp and heat emboss a large bloom and leaves from the "Grand Garden" stamp set by Gina K. Designs.  I used Fine Detail Silver embossing powder and stamped the images on Strathmore watercolor paper.


I watercolored the images using Gansai Tambi watercolors and fussy cut the bloom and leaves.  I splattered the stenciled panel with White Gloss Spray by Dina Wakley, heat embossed the sentiment on vellum, mounted the images on foam pads and lastly added Gunmetal sequins for sparkle and shine.

Please stop by the challenge and have a look at the inspiration provided by the design team, they are a talented group!

Until next time, Happy Crafting!

Donna

**Challenges Entered:
A Place to Start - Elements are Card, Thinking of You or Encouragement, Sequins, Vellum and Embossing


Sunday, June 6, 2021

You're a Limited Edition

Hello and Happy Sunday!  I trust you've had an enjoyable weekend thus far.  Today's make and share features watercolor, stamping, butterflies and heat embossing.


This card measures 5" square and I started with watercoloring a panel of Tim Holtz Watercolor paper with Salty Ocean and Cracked Pistachio Distress Inks.  After fully drying, I stamped butterflies from the Gina K. Designs Beautiful Butterflies Stamp set using Sea Glass Dye Ink, also from Gina K.  I was going for a monochrome background with a large focal Butterfly, which I heat embossed with Fine Detail White Powder.  

I wanted more texture to the piece so I inked the edges with VersaMark and sprinkled Oceanic Embossing Powder from WOW!  Happy with the edges, I mounted the panel on foam strips and placed on the card base.  The sentiment strip is a CZ Designs from Simon Says Stamp and lastly, placed clear water droplet gems for additional texture and interest.

Until next time, Happy Crafting!

Donna

**Challenges Entered:
Stamping Sensations - It's hard to pick 1 fav technique but I do love heat embossing


Sunday, May 30, 2021

Hello Sunflowers and Sunshine

Good Sunday to you!  I hope your weekend has been great so far and if you're having a holiday tomorrow, I wish you lots of enjoyment.  Today's make and share features a Trio of Sunflowers.


I've made a Mini Slimline card measuring 8"x4" with Sunflowers from the Spellbinders Fun Stampers Journey Hello Sunflower Stamp Set.  I stamped the smallest of the sunflower images 3 times and colored with Spectrum Noir Alcohol Markers.  I die cut the images with a circle die and mounted them on foam pads.  The sentiment, from the same set, was heat embossed and mounted on foam pads.  I adhered all to a card base with mats from 12x12 single sheets of designer papers from Hobby Lobby.  Lastly, added twine and sequins for a finishing touch.

Sunflowers are one of my favorite flowers and it's sad the stalk only produces one bloom then it's done.  Sunflowers say Summer and Fall to me.  Until next time, Happy Crafting!

Donna

**Challenges Entered:


Friday, May 28, 2021

Flower Child

It's Fri-YAY!  We've made it to the weekend and here in the States, it's a holiday weekend!  What are your plans for this Memorial Day Weekend?  Mine? Swimming, BBQ'ing, Lounging with a cool drink and Crafting!

Let's move on with todays make and share.  This A2 sized card features lots of scrap card, stamping and heat embossing.  


I was inspired to create this card from watching a Gina K. Designs You Tube Video so I cut up strips of scrap card and adhered to a piece of printer paper.  I wanted to adhere to printer paper in case something went wonky.  Once adhered, I stamped the image and sentiment; both from Gina K. Desings' "Flower Child" stamp set on top of the strips and heat embossed using Fine Detail Powder.  

Lastly, added panel to a card base of 110 lb. Neenah Classic Crest Solar White card and placed sequins for a bit of shine.  A nice way to use some scrap card and I know we all have loads of it!

Until next time, Happy Crafting!

Donna

**Challenges Entered:


Wednesday, May 26, 2021

Hope Blooms

Hello and Happy Wednesday, I hope your week is going great!  Today's make and share features a large bouquet, heat embossing and watercoloring.


This card measures 5" square, the floral bouquet and sentiment are part of the Altenew Simply Spring stamp set.  This image is huge, as you can see, I trimmed some off (which hurt my heart) so I could arrange it on the card front.  

I heat embossed using copper embossing powder and watercolored, cut out with the coordinating dies and mounted on foam pads for dimension.  The designer papers are from the Bo Bunny "Family Heirlooms Collection".  I stamped the sentiment on a snippet of the designer paper using Charcoal Brown ink by Gina K. Designs.  Finishing up, I added a Polka Dot Ribbon, Bow and faux Pearls for interest.  My attempt at a "Vintage" theme.

I would like to remind you of my challenge at The Inspiration Station.  Please visit and be inspired by the photo and enter your design!

Until next time, Happy Crafting!

Donna

**Challenges Entered:
Double D Challenges - Orange, Pink and Yellow Poppies in the Bouquet
As You Like It - I go between watercolor and alcohol marker as a fav to add color